IObit Advanced SystemCare will speed-up your PC, auto-fix all its errors & enhance your online security.
Ever taken a screenshot on your Windows computer and then found yourself wondering where it went or disappeared to? Screenshots are invaluable for capturing moments or important information on your screen, but locating them afterward can sometimes feel like a wild goose chase.

So where are screenshots saved in Windows? In this guide, we’ll find out where screenshots are saved in Windows 10 and Windows 11 by default.
Whether you’re a tech-savvy enthusiast or a casual user, understanding where screenshots are stored will make your life a whole lot easier.
In addition, we recommend unhiding hidden folders in case you accidentally saved them there.
So let’s find out!
UNDERSTAND INSTANTLY: Where are Screenshots Saved in Windows?
- Screenshots Taken Using the Prt Sc Key: Automatically copied to the clipboard or can be saved manually from the preview screen.
- Screenshots Taken Using the Windows + Prt Sc Keys: Saved in the Pictures > Screenshots folder of your PC.
- Screenshots Taken Using the Snipping Tool: Saved in the Pictures > Screenshots folder of your PC.
Read on to learn more in detail about where screenshots are saved in Windows.
Where are My Screenshots Saved in Windows?
You can take a screenshot in Windows by pressing the “Print Screen” key or by using the Snipping Tool. However, when you take a screenshot in Windows, it instantly disappears, leaving you wondering where to find it.
Finding where these screenshots are saved on Windows depends on which method you used to take the screenshot.
Let’s take a look at these methods and where are they saved by default.
1: If You Have Taken the Screenshot Using the Snipping Tool
If you use the Snipping Tool to take a screenshot by pressing ‘Windows + Shift + S’ keys, you will see a small pop-up at the bottom right. You can open and edit the screenshot by clicking on this pop-up and even select a location to save that screenshot in.
- To select the save location, press ‘Ctrl + S’ or click on the ‘save’ icon at the top right to select a location.
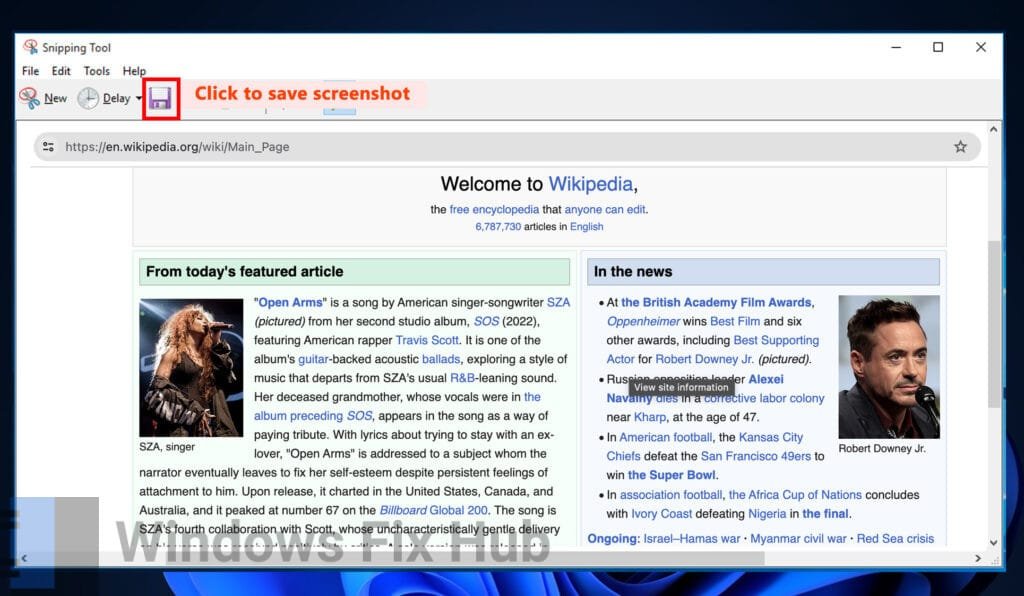
- If you don’t select a save location, the screenshots taken using the Snipping Tool go to the “Pictures” > “Screenshots” folder by default.
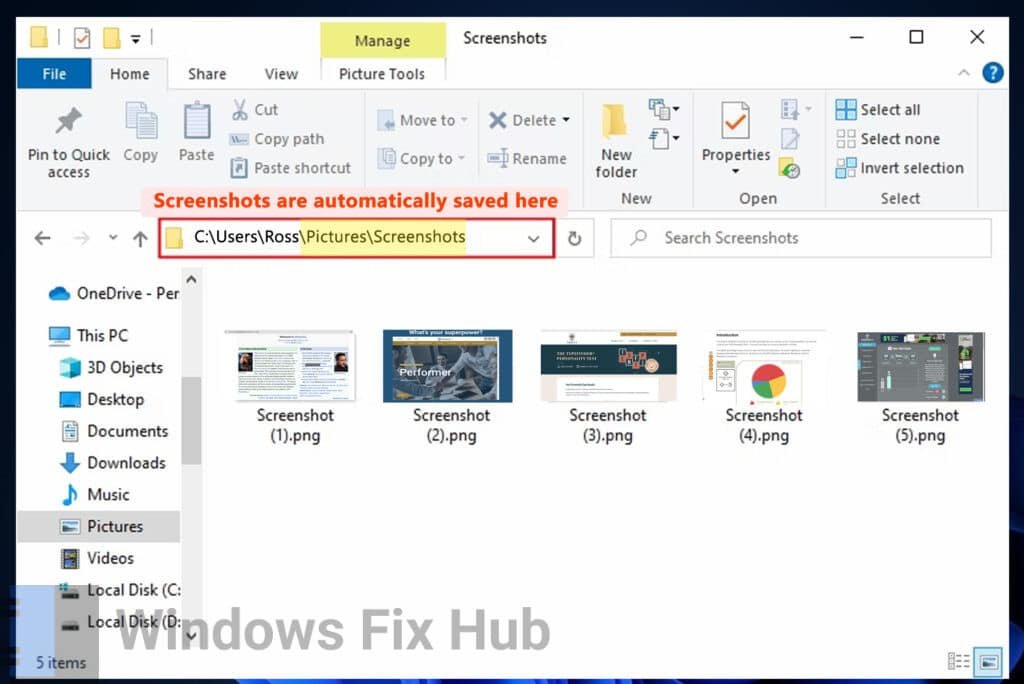
2: If You Have Taken the Screenshot Using the Prt Sc Key
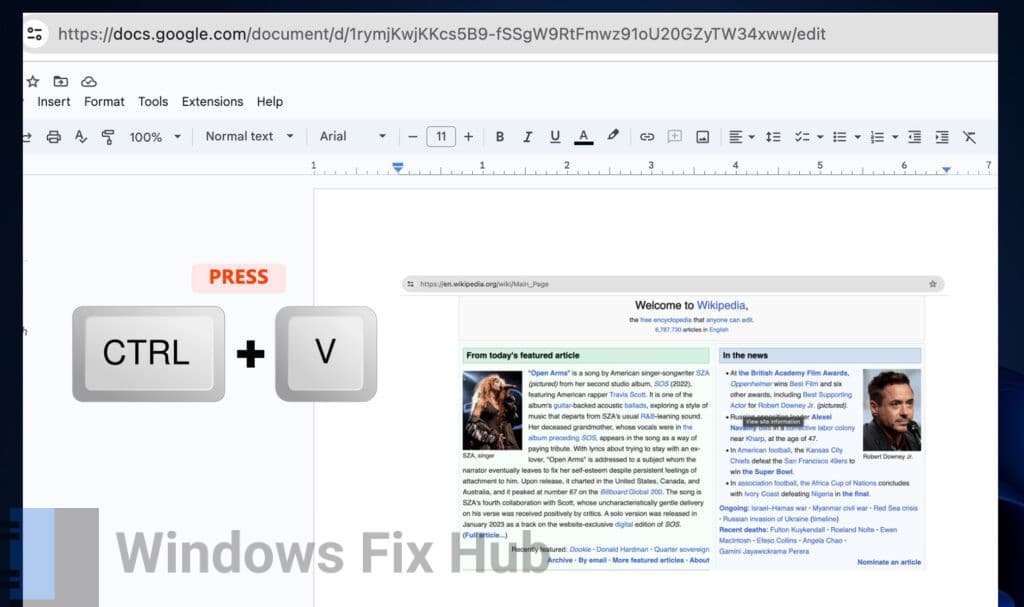
When you press the ‘Prt Sc’ key on your Windows PC, it will capture your entire Window. The screenshots taken with the ‘Prt Sc’key go to the “clipboard”, from where you will have to save them manually by using an image editor.
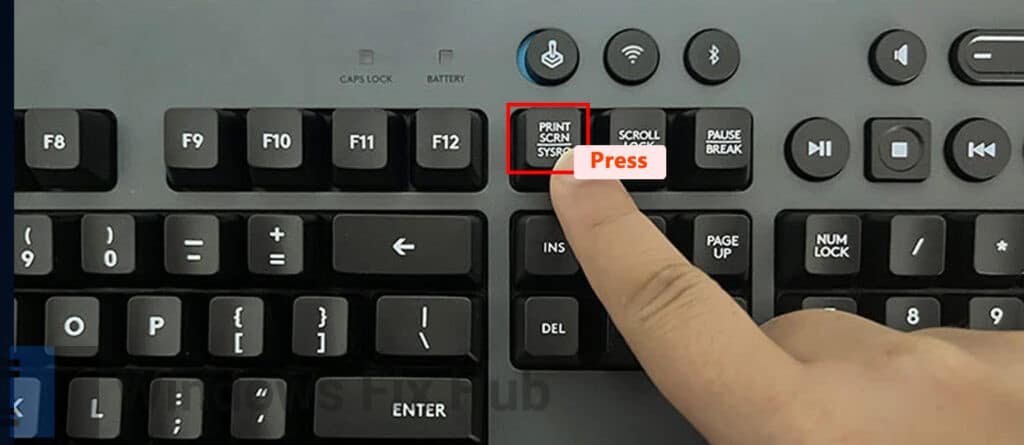
Or, you can paste them into any apps that allow you to paste images, such as Google Docs. So you can either paste the screenshots directly into supported programs or you can save them manually to the folder of your choice.
3: If You Have Taken the Screenshot Using the Windows + Prt Sc Keys
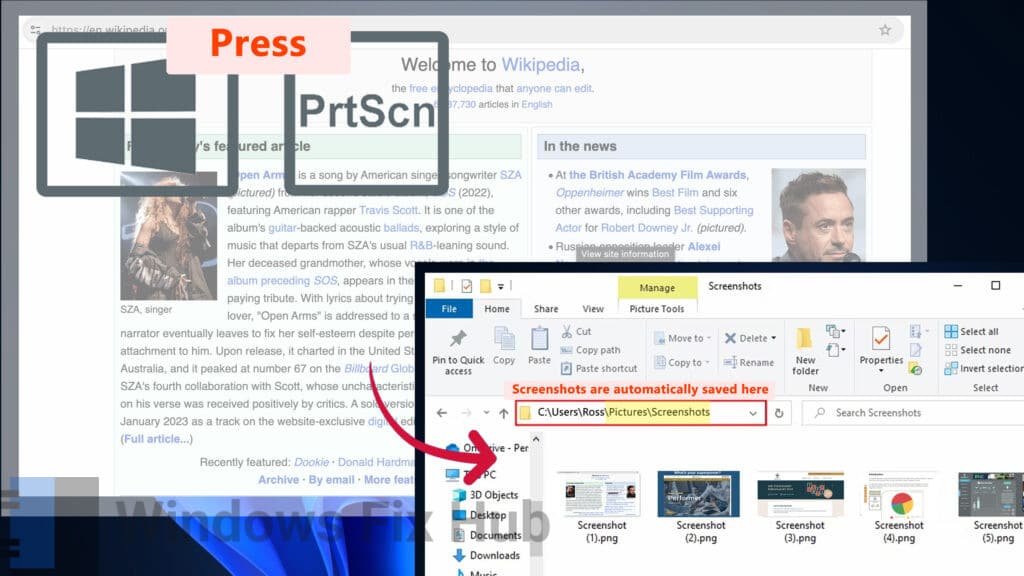
When you press the ‘Windows + Prt Sc’ keys on your PC, you will notice your screen dimming for a few seconds to take a screenshot. Screenshots taken using this method are saved in the “Pictures” > “Screenshots” folder of your PC.
4: If You Have Taken the Screenshot Using the Xbox Game Bar
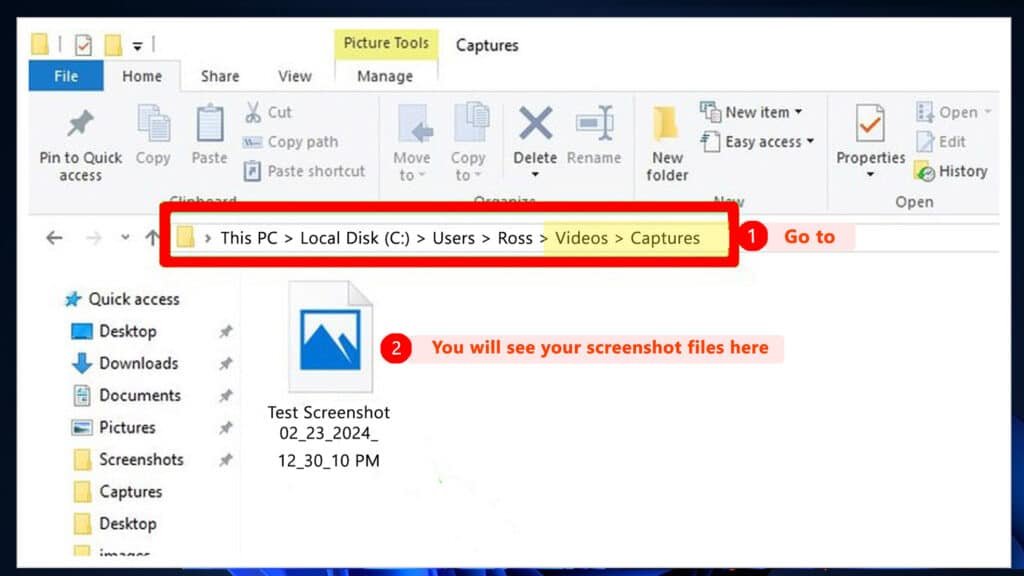
You can also take screenshots in Windows by using the Xbox Game Bar. You can access the screenshots taken using this method in the following path:
- This PC > Local Disk (C:) > Users > [your username] > Videos > Captures. Just make sure to type your actual user name in the [your username] path.
- Alternatively, you can find the screenshots in the “Xbox Game Bar” itself. To do so, open the “Xbox Game Bar” app by pressing ‘Windows + G’. Now select the camera icon in the app to open the “Capture Widget” and then go to “Show all captures”.
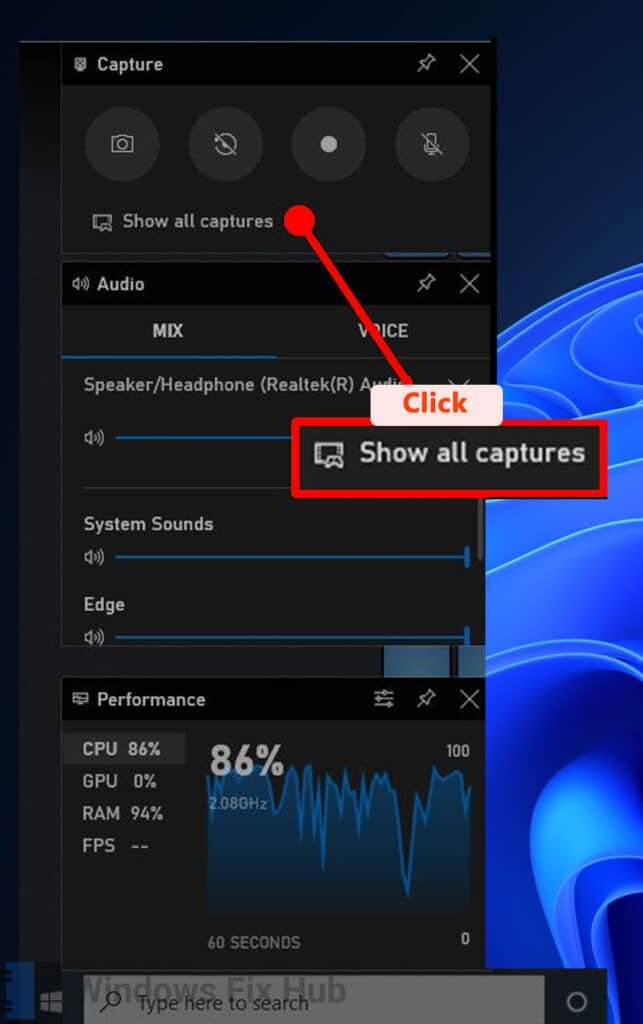
- This would open the screenshots gallery. Now select the folder icon in the left panel and then select “Continue” in the resulting pop-up.
- In the pop-up, click “Continue” , and it will open the screenshots folder.
And that’s it!
There are various ways to view the screenshots depending on how you’ve taken them.
We hope you’ve managed to successfully find your screenshots.
Good luck!
iobit Advanced System Care is used by millions of users worldwide.
It’s a “must-have” for every PC or MAC user who wants:
- To fix common PC errors automatically
- To speed up their computer performance
- To fully secure their device


