Get NordVPN with 62% discount now & enjoy limitless speed browsing and top-notch security for your PC!
Whether you are taking an online class or getting ready for a meeting or a webinar, you always want to put your best foot forward. And one thing you can do to ensure that is by testing your microphone and camera before going live.

Testing your webcam and microphone before a meeting also ensures that you don’t have any technical issues at your end. But how to test your webcam and microphone on Windows?
In this guide, we have listed a few simple and quick steps to help you avoid any technical mishaps & test your mic and camera successfully. So read on.
DO IT NOW: How to Test Your Webcam and Microphone on Windows?
- To test your webcam: Launch the Camera app to test your built-in webcam.
- To test your microphone: Go to “Start” > “Settings” > “System” > “Sound” and navigate to the ‘default microphone’s’ input settings to start a test.
Below, we have detailed how to test your internal and external webcam as well as microphone on Windows. Let’s continue with the detailed steps.
How to Test Your Webcam on Windows?
To test your built-in webcam:
If your Windows PC or laptop has a built-in webcam, you can test it using the Camera app by following these steps:
- Go to ‘Windows’ search and type “Camera”.
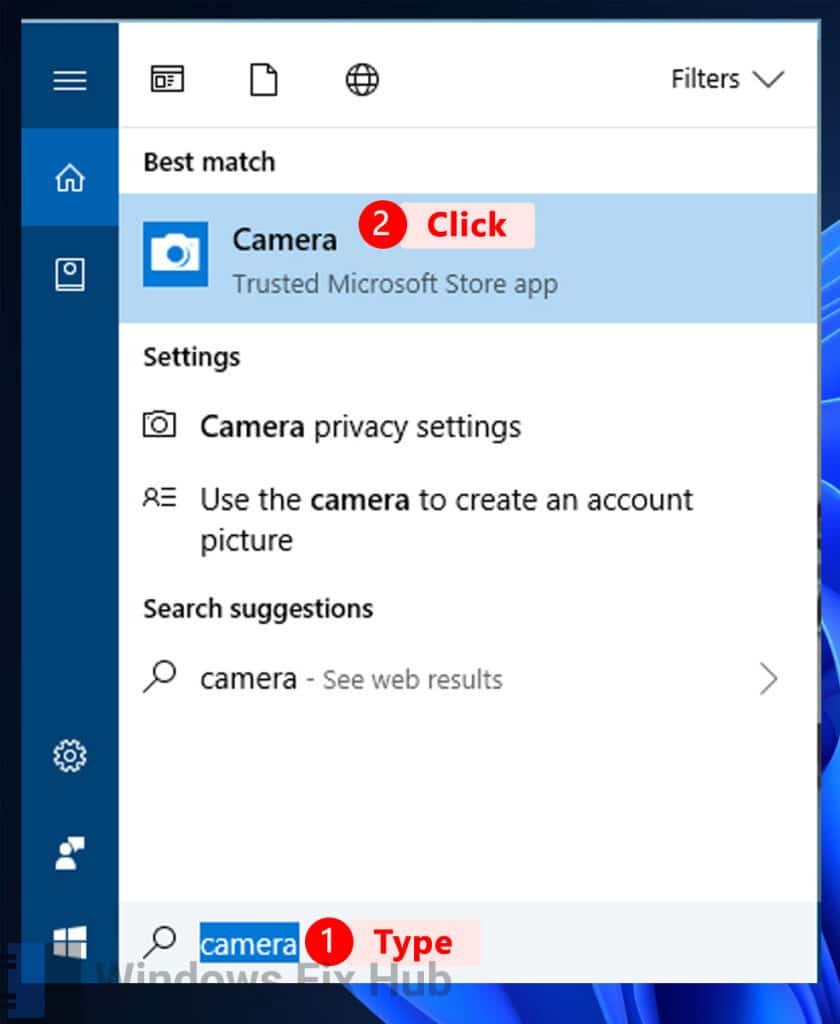
If you can view high-quality footage in the app without any issues, then the camera app is working fine.
To test your external webcam:
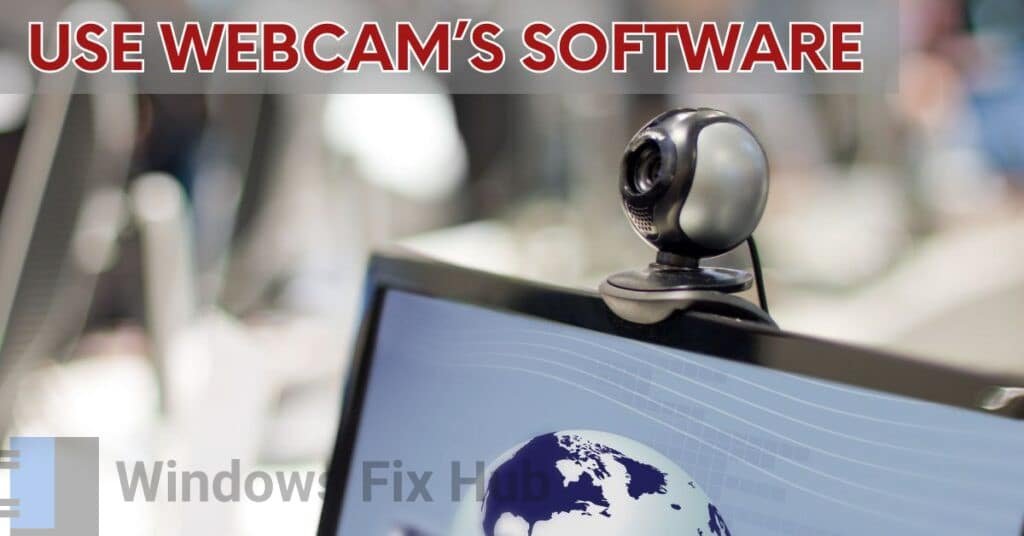
External webcams have dedicated software to operate. If you use an external webcam with your Windows PC, use the official webcam software to test the camera.
How to Easily Test Your Microphone?
You can test an external microphone by connecting it to your PC and running a test. To do so, follow these steps:
- After connecting your microphone, right-click on the “Start” button.
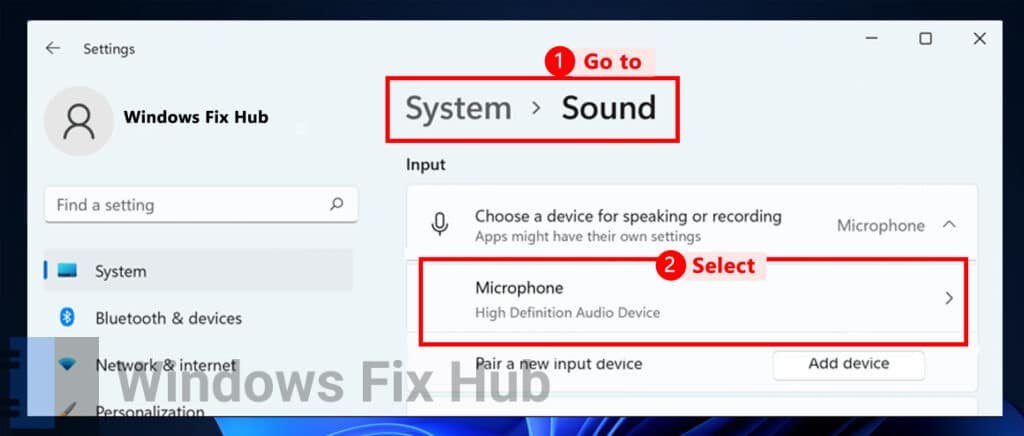
- Now go to “Settings” > “System” > “Sound”.
- Select your desired microphone from the “Input” section and go to “Input settings”.
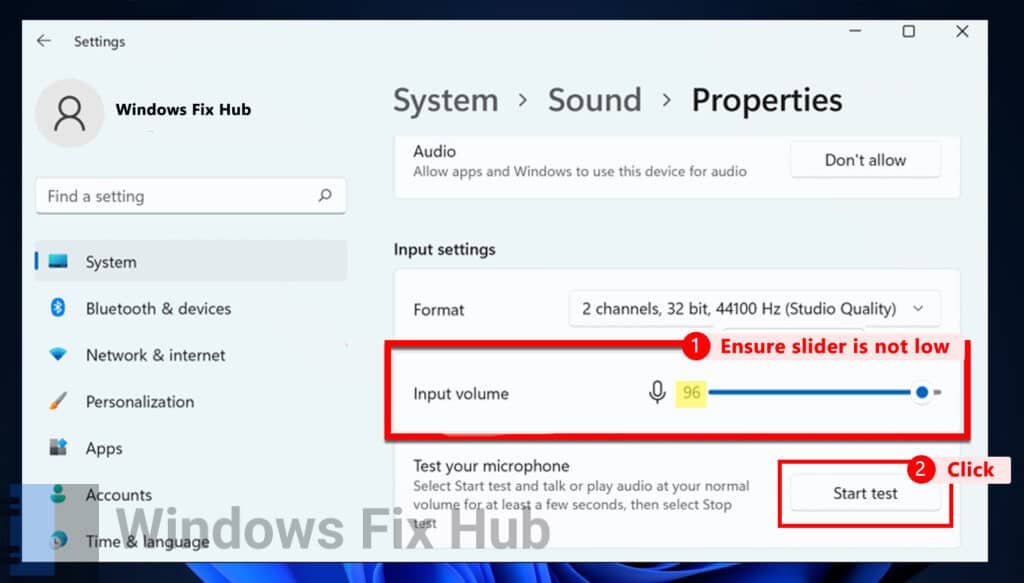
- Make sure that the “input volume” slider is not low.
- Now select “Start test” and say something into your microphone.
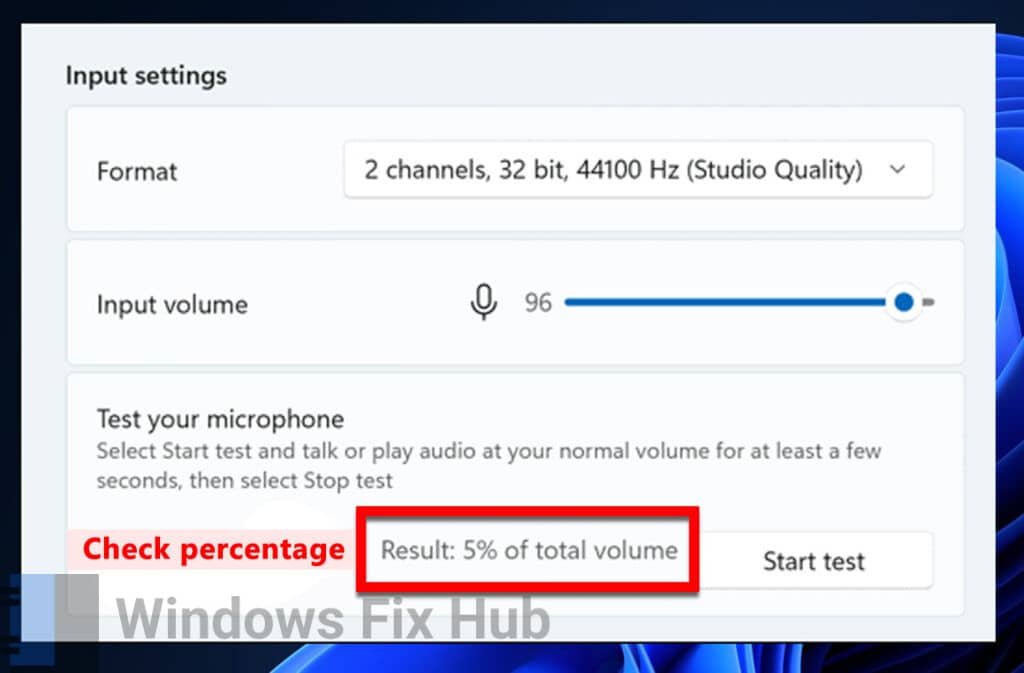
- Once done, select “Stop test”.
The window will display a percentage result of the total volume next to the “Start test” button. If the results are higher than 75%, then your microphone is working perfectly. But if they are anywhere lower than 50%, then something is wrong with your microphone
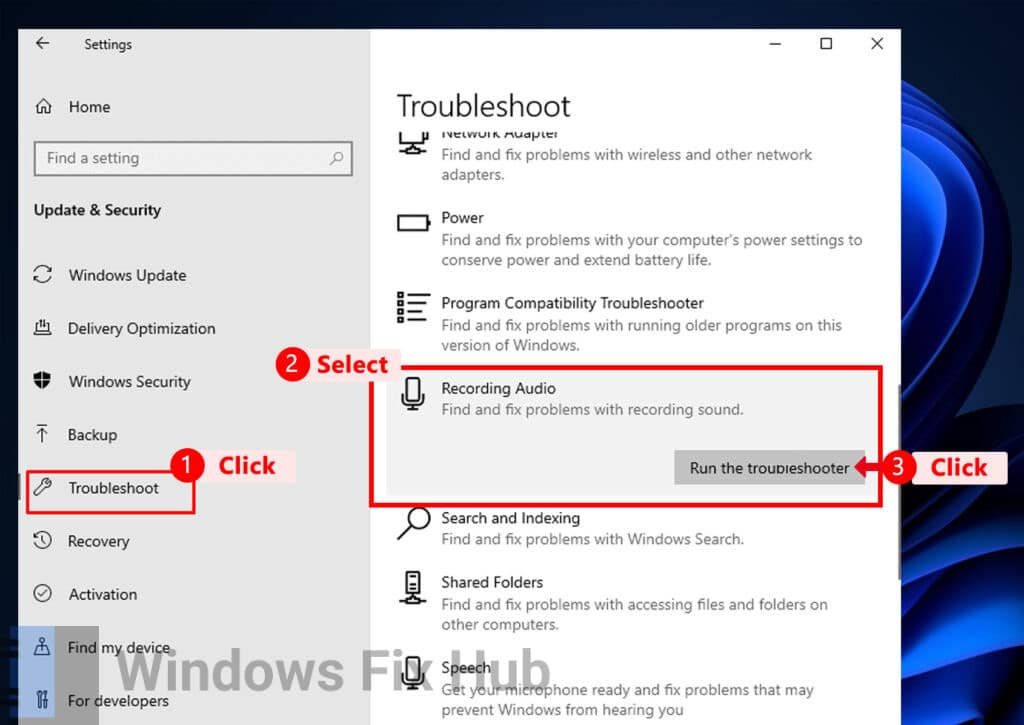
You can run the Recording Audio troubleshooter in Windows to identify and fix any problems. Here’s how to do so:
- Go to Windows “Settings” > “System” > “Troubleshoot”.
- Now select “Other Troubleshooters” and look for “Recording Audio”.
- Click on the “Run” button to let your system scan for any issues.
- Once the initial scan is finished, select your problematic microphone device and hit “Next”.
- Your PC will run a scan again and fix any issues it may identify. To apply the fixes, hit the “Apply” button.
- Once done, restart your PC and test your microphone again.
Any webcam or microphone-related mishap during a meeting can ruin your image. Therefore, take the time to test your webcam and microphone before any meeting so you can put your best foot forward.
We hope that our tested and approved methods to test your cam and mic helped you!
Good luck!
NordVPN is a top-notch virtual private network used by millions of users worldwide.
It’s a “must-have” for every PC or MAC user who cares about their privacy & security:
- It blocks annoying and malicious ads;
- Stops viruses during online downloads;
- It hides your identity from hackers, trackers, and even the Government!
- Unblocks GEO-restricted content.

