Fix your Windows & gaming errors automatically with FREE Advanced SystemCare app & enhance your online security.
Are you encountering the “Exception from HRESULT: 0x87E00009” error when trying to download or install Minecraft? The full error message might say:
“Sorry about that! Something went wrong. We’re aware of the issue and working to fix it. Try refreshing or come back later. Code: 0x87E00009.”
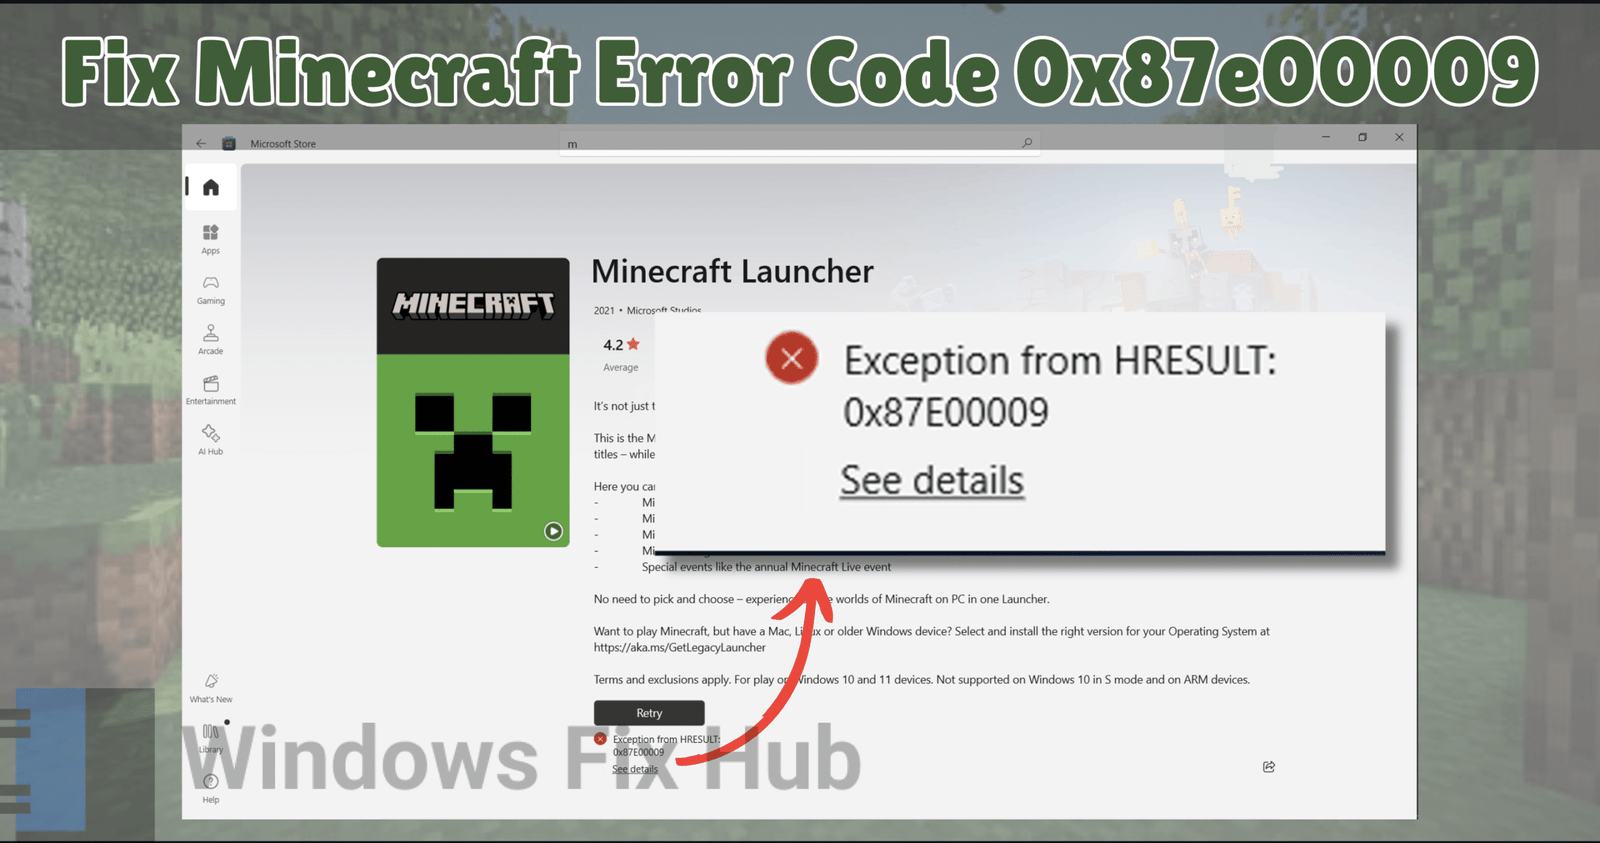
This error typically appears when attempting to download and install the Minecraft Launcher from the Microsoft Store but can also affect other Microsoft games and apps.
Possible causes of this error include corrupted system files, issues with the Microsoft Store cache, firewall settings blocking the installation, or problems with Windows updates. Another common cause is a temporary server issue on Microsoft’s end. Issues with Windows Update components, which are closely linked to the Microsoft Store’s functionality, can also contribute to this error.
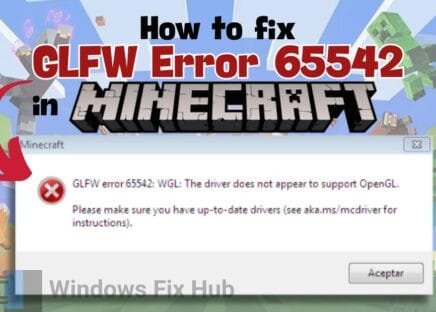
If those issues are present, you might also get similar Minecraft errors like: GLFW Error 65542 and ‘No Applicable App Licenses Found’.
This article provides a detailed yet straightforward guide on how to resolve this issue using several effective solutions.
TRY IT NOW: Quick Solutions to Fix the
Minecraft Exception from HRESULT: 0x87E00009 Error
Here are a few quick solutions you can try to fix the problem:
- Automatically identify and fix common issues using Windows Store Apps troubleshooter.
- Ensure that you have updated your Windows OS to the latest version.
- Delete Microsoft Store cache to fix related problems preventing app installation.
- Modify Firewall settings as it might be blocking the Minecraft Launcher installation.
- Run the GameLauncherHelper.exe directly from the Xbox Games Directory
In the next sections, we will discuss these and some advanced solutions with detailed instructions.
Easy Solutions to Fix the
Minecraft Launcher Error Code 0x87e00009 (5 Ways)
Let’s start with a few straightforward fixes you can try before diving into more advanced troubleshooting. These easy solutions can often resolve the issue quickly.
Solution 1. Use the Windows Store Apps Troubleshooter
The Windows Store Apps troubleshooter can automatically detect issues and apply necessary fixes to resolve installation errors. Follow the below:
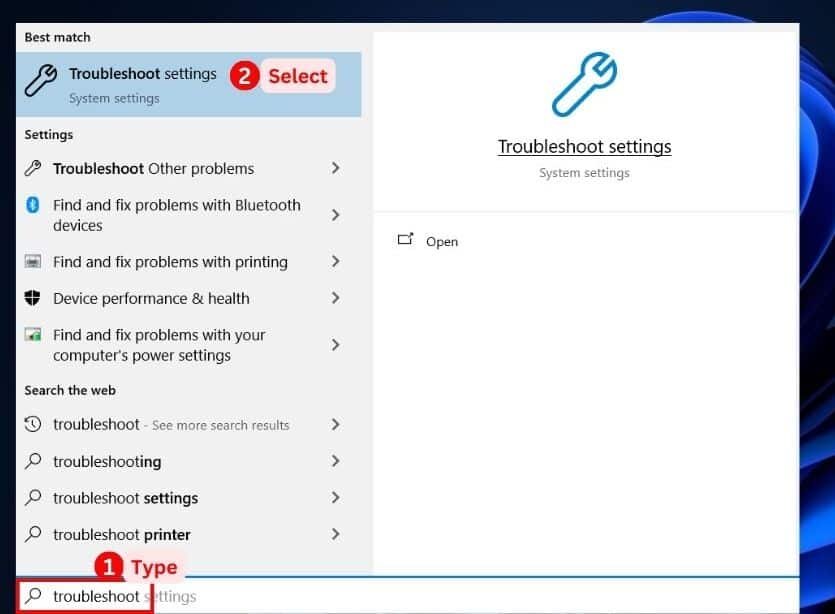
- Press the ‘Win + S’ keys, type “Troubleshoot” in the search bar, and hit ‘Enter’.
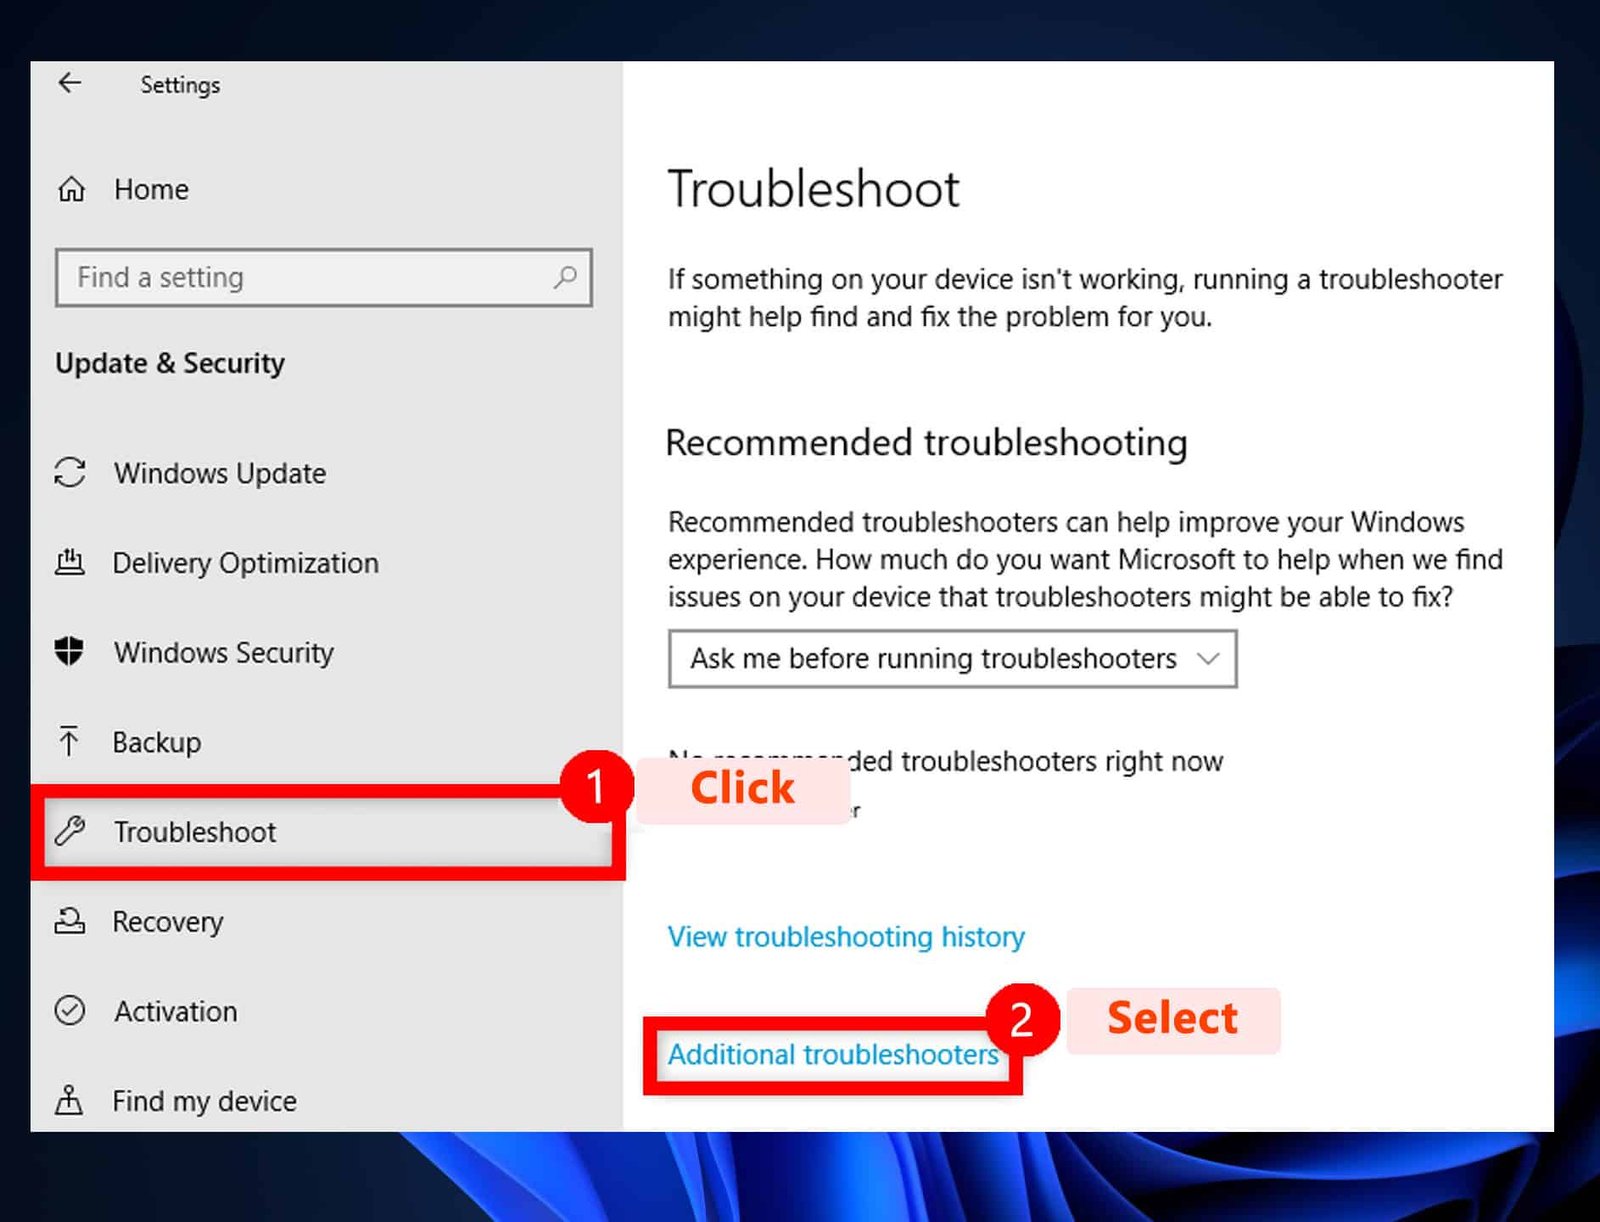
- Click on “Additional troubleshooters” or “Other troubleshooters”.
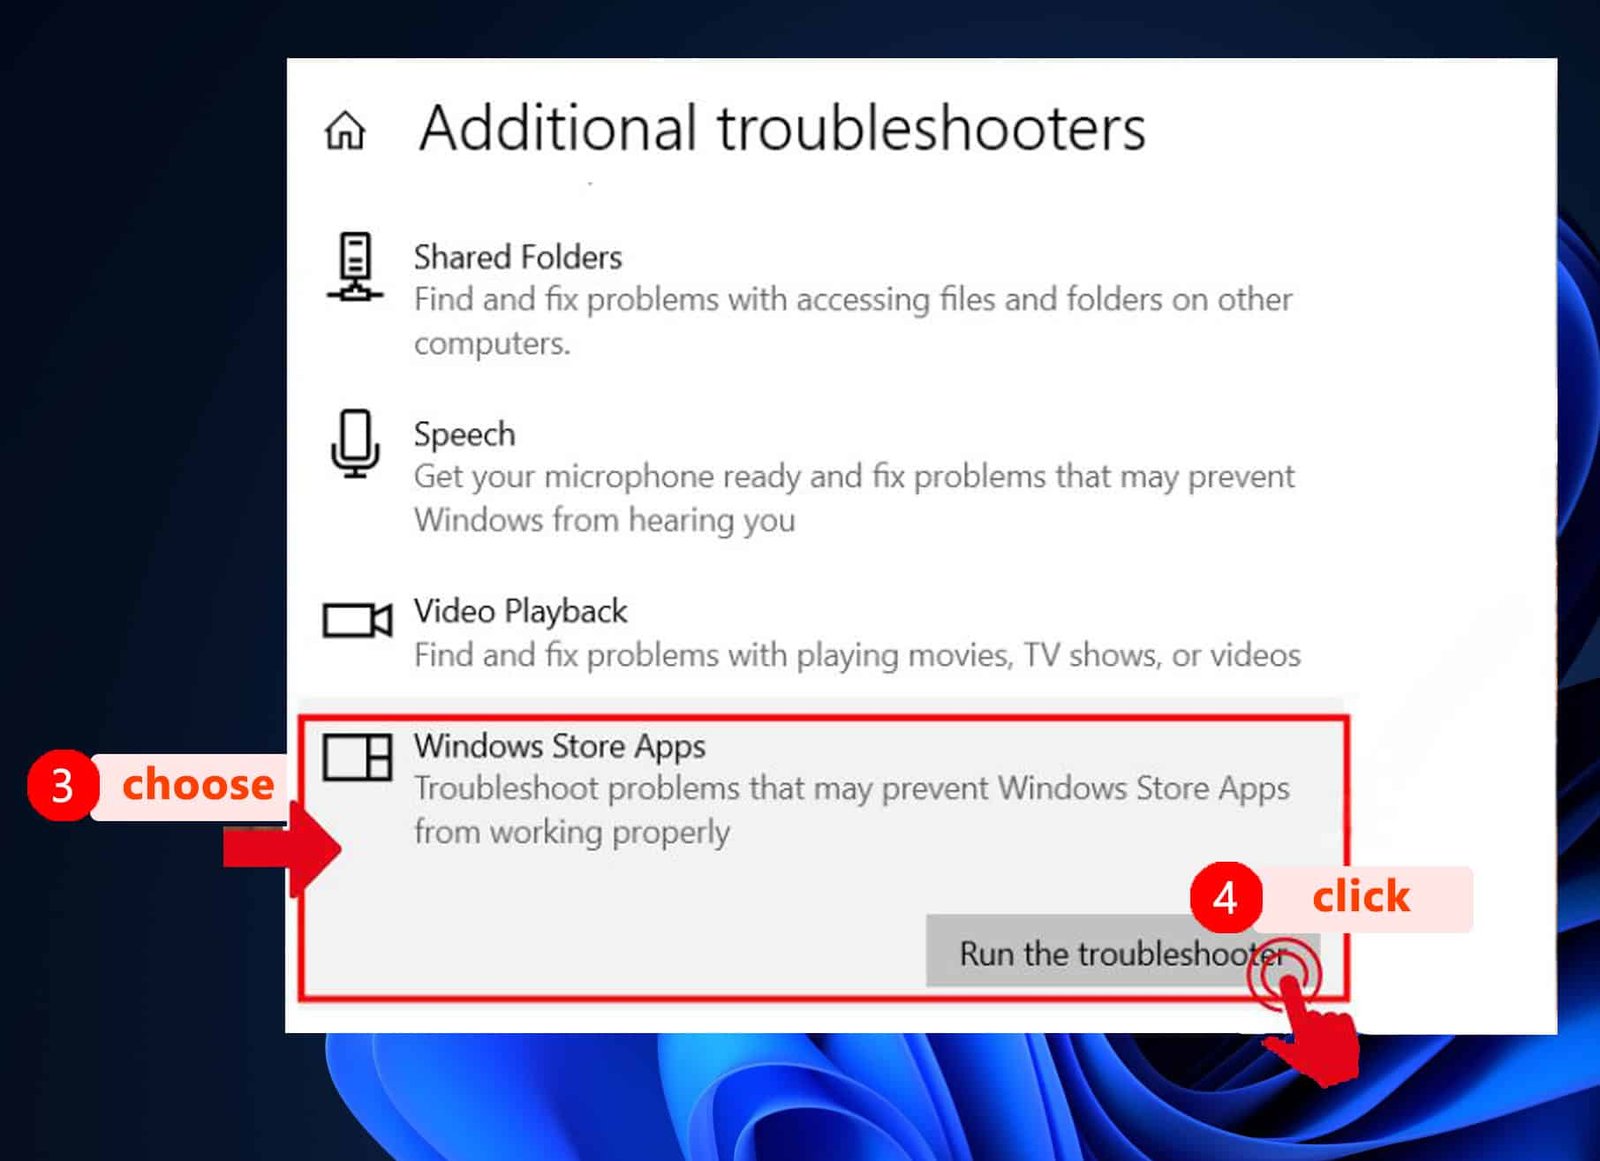
- Find “Windows Store Apps” in the list and click on “Run the troubleshooter”.
- Allow the process to complete and implement any suggested solutions.
Solution 2. Update Your Windows OS
Keeping Windows up-to-date ensures that you have the latest features and security improvements, which can help in resolving software installation errors. Here’s how you can update your system:
- Press the ‘Win + S’ keys, type “Check for Updates” in the search bar, and hit ‘Enter’.
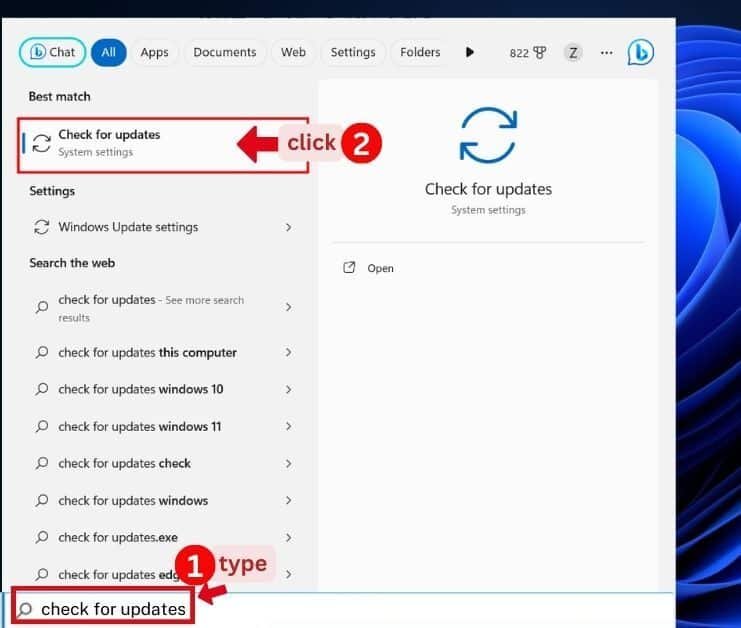
- Click on “Check for updates”.
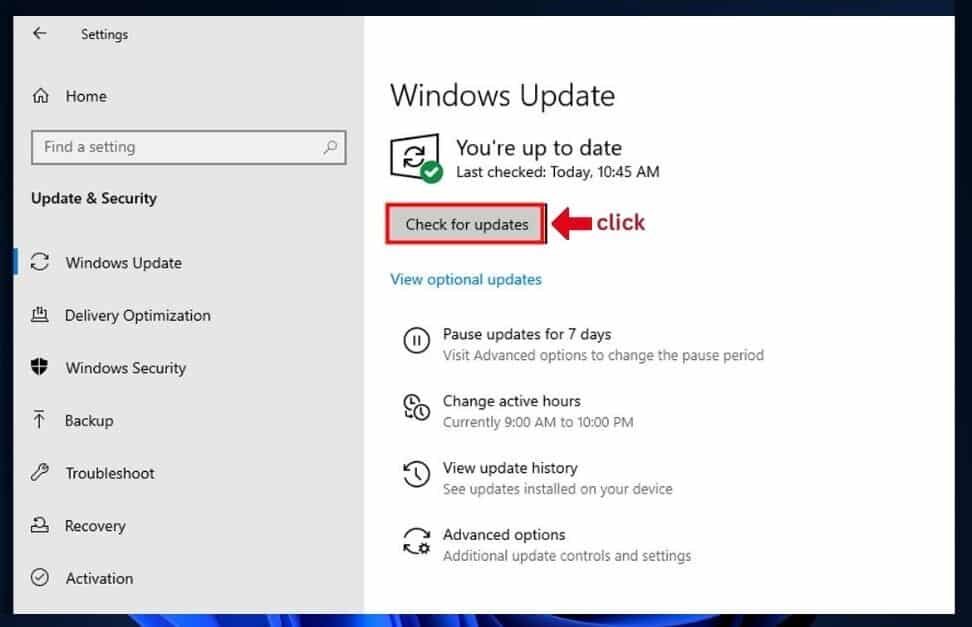
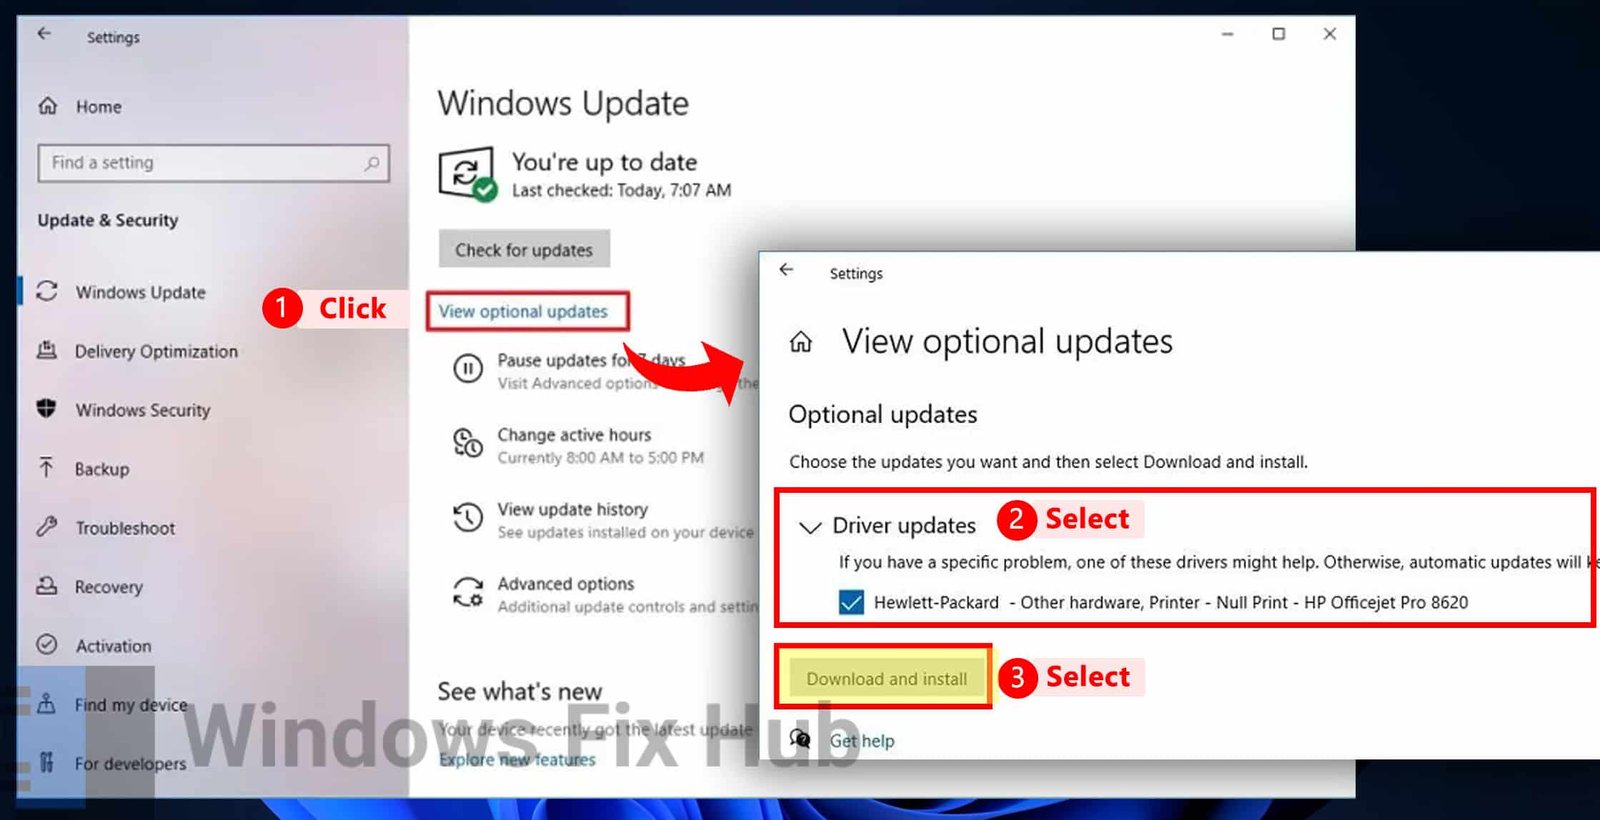
- Install any available updates including the optional updates.
- Restart your computer if prompted.
Solution 3. Clear the Microsoft Store Cache
A corrupted Microsoft Store cache can prevent applications from installing correctly. Clearing it might solve the error. Here’s how you can do it:
- Press ‘Win + R’ to launch the “Run” dialog.
- Type “wsreset.exe” in the dialog box and hit ‘Enter’.
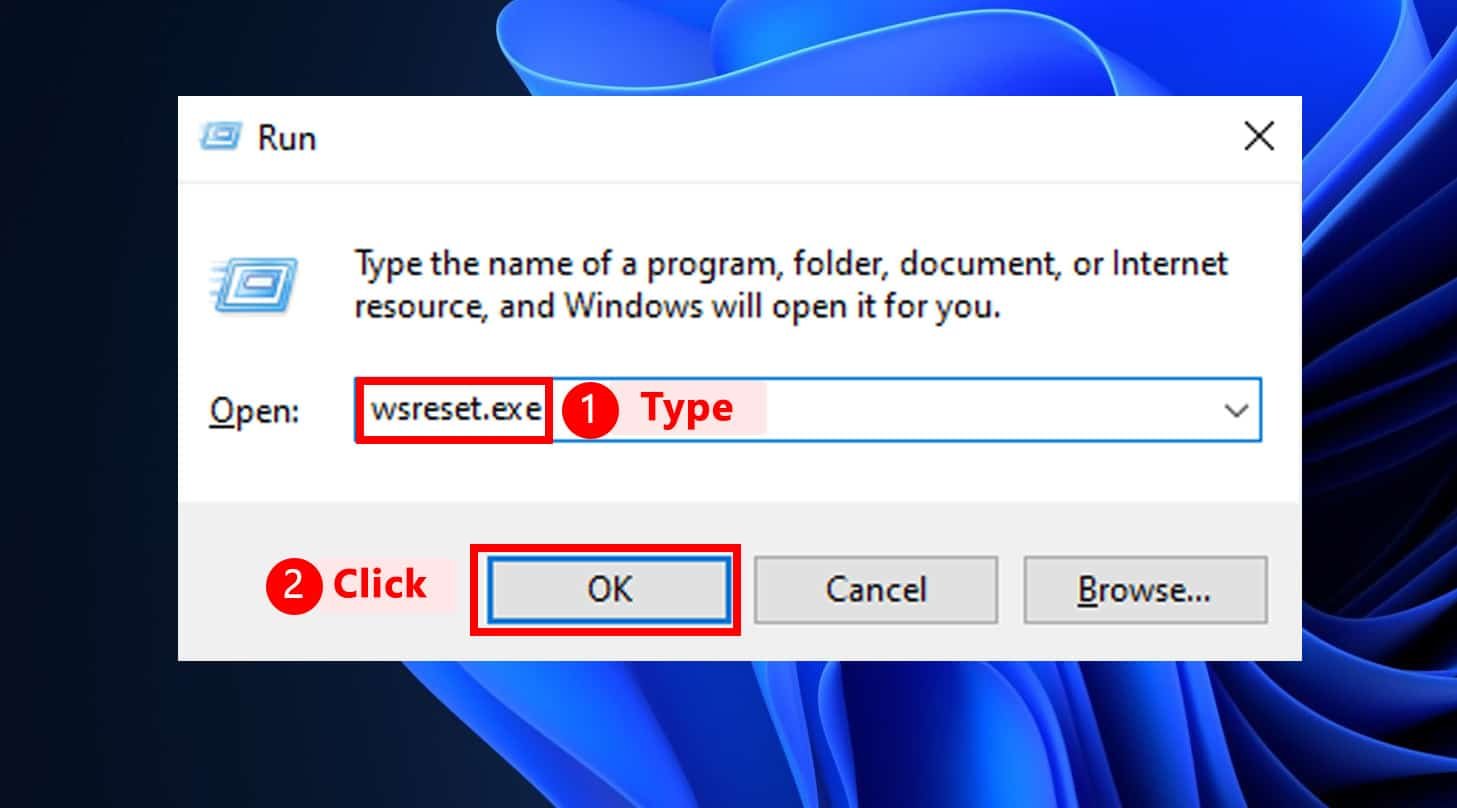
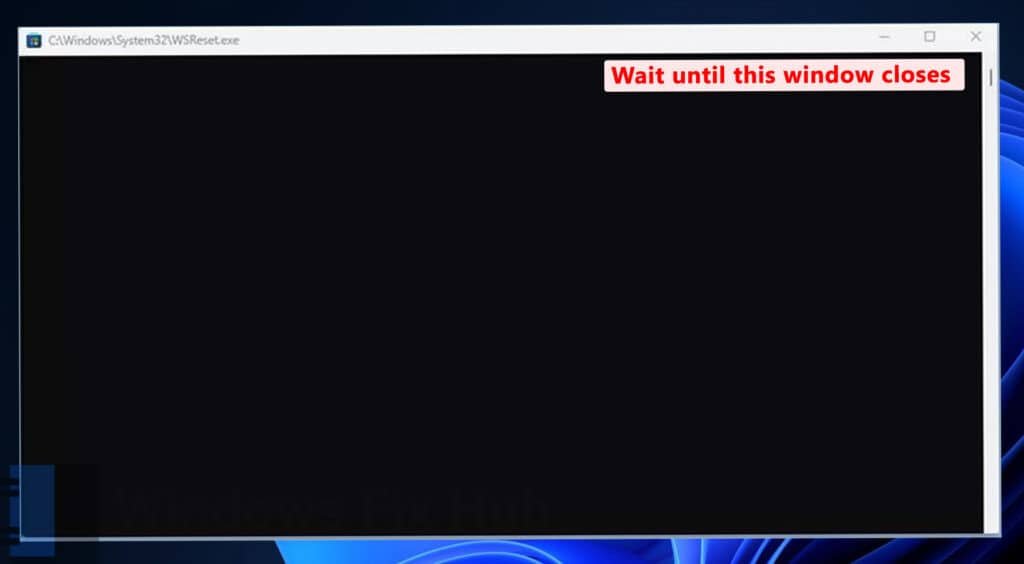
- A blank “Command Prompt” window will open, do not close it. Wait for it to close automatically and for the “Microsoft Store” to open.
- Attempt to install “Minecraft” once more.
Solution 4. Modify Firewall Settings
Sometimes, firewall settings might block the installation of certain applications. Allowing the Minecraft Launcher through the firewall can prevent it from being blocked during installation.
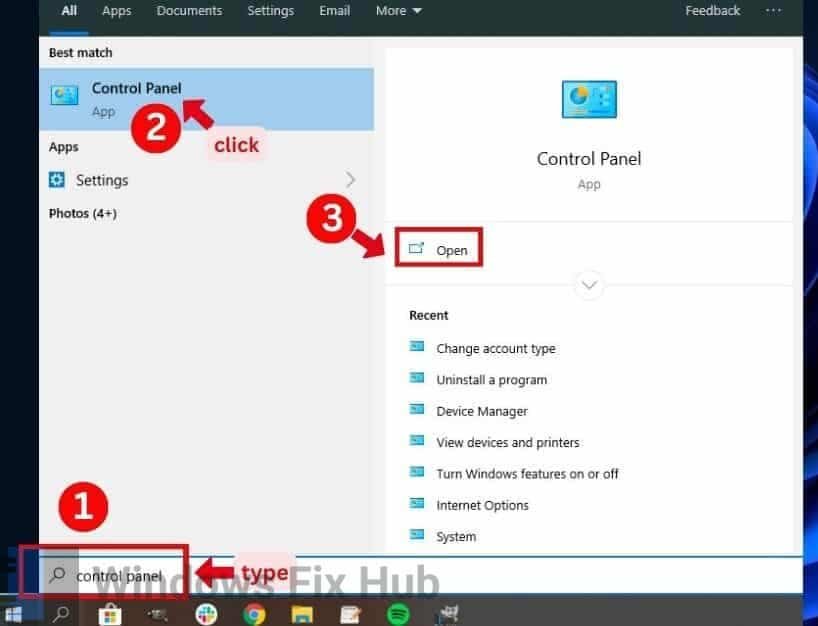
- Press the ‘Win + S’ keys, type “contro; panel”, and open “Control Panel”.
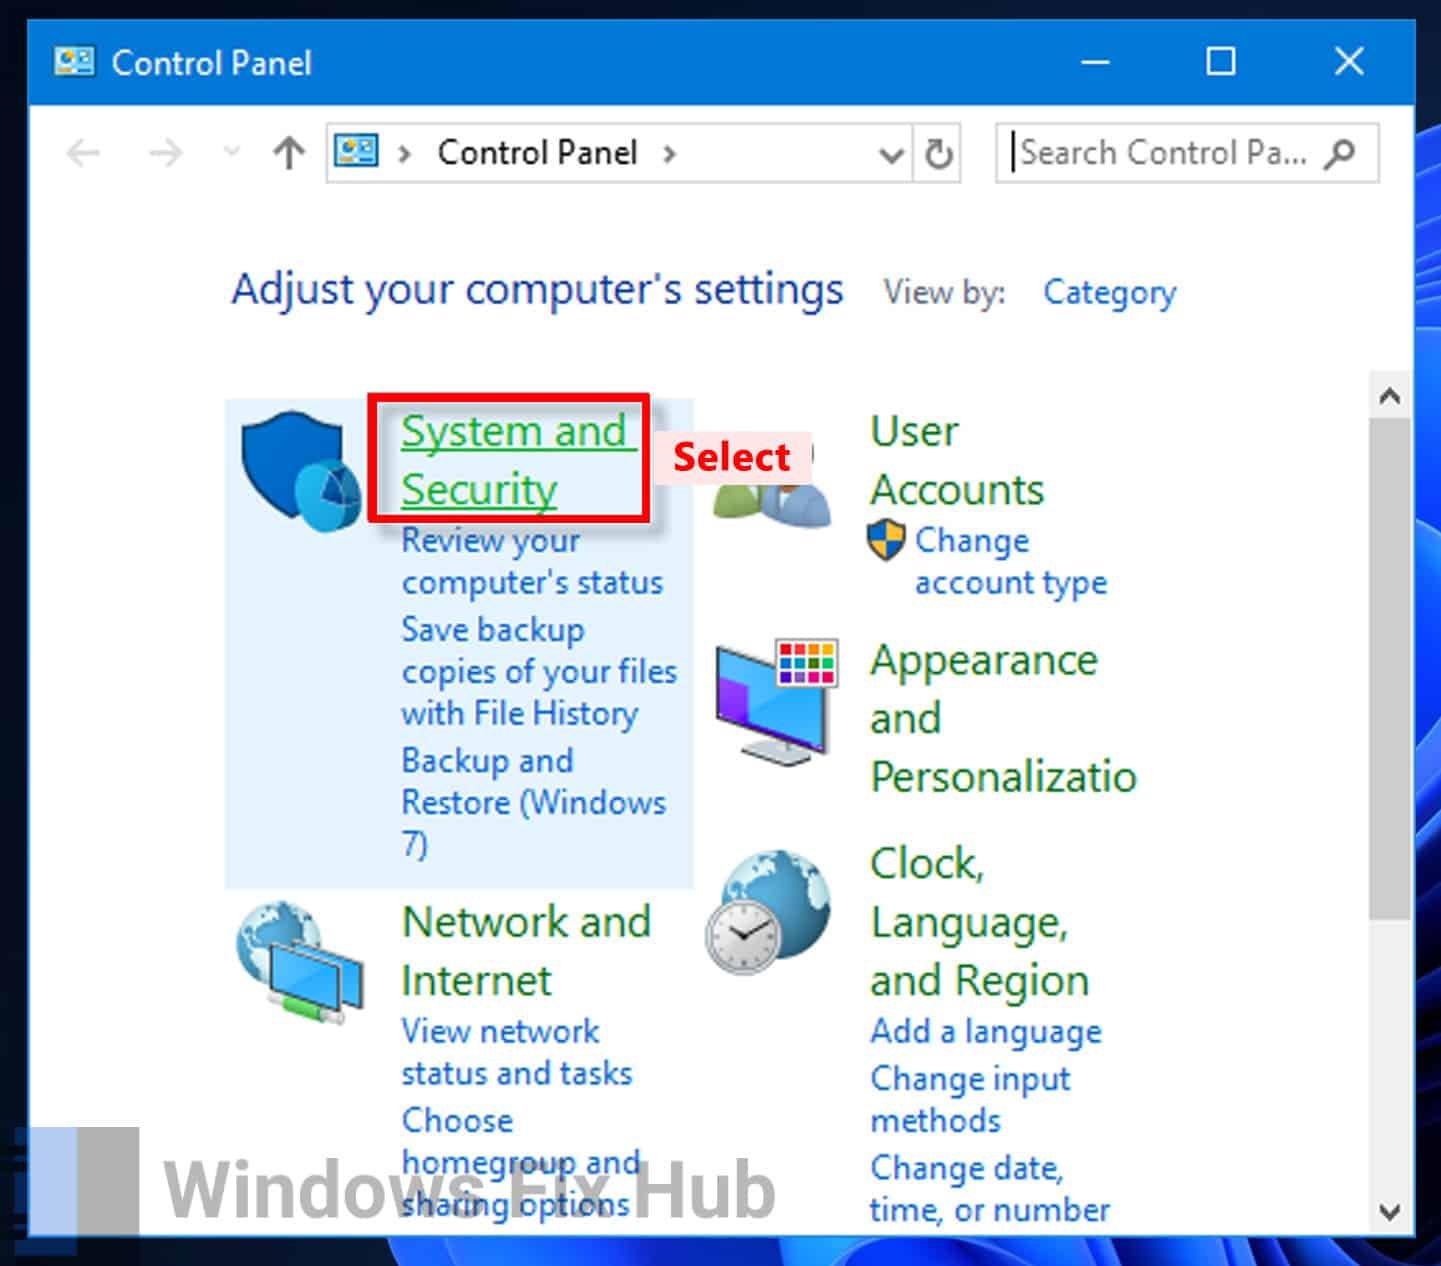
- Go to “System and Security”.
- Within the “Windows Defender Firewall” section, opt for “Allow an app through Windows Defender Firewall”.
- Click “Change settings”.
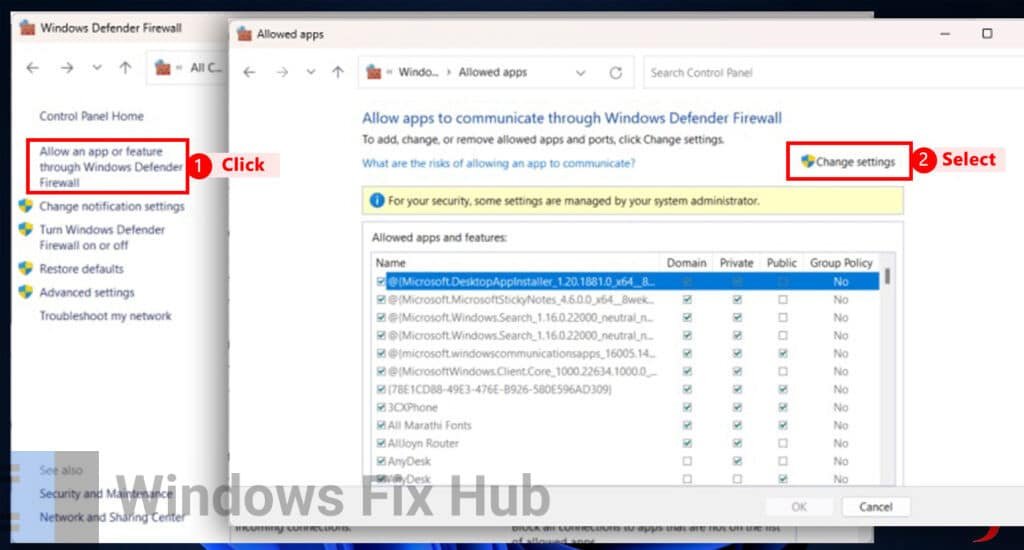
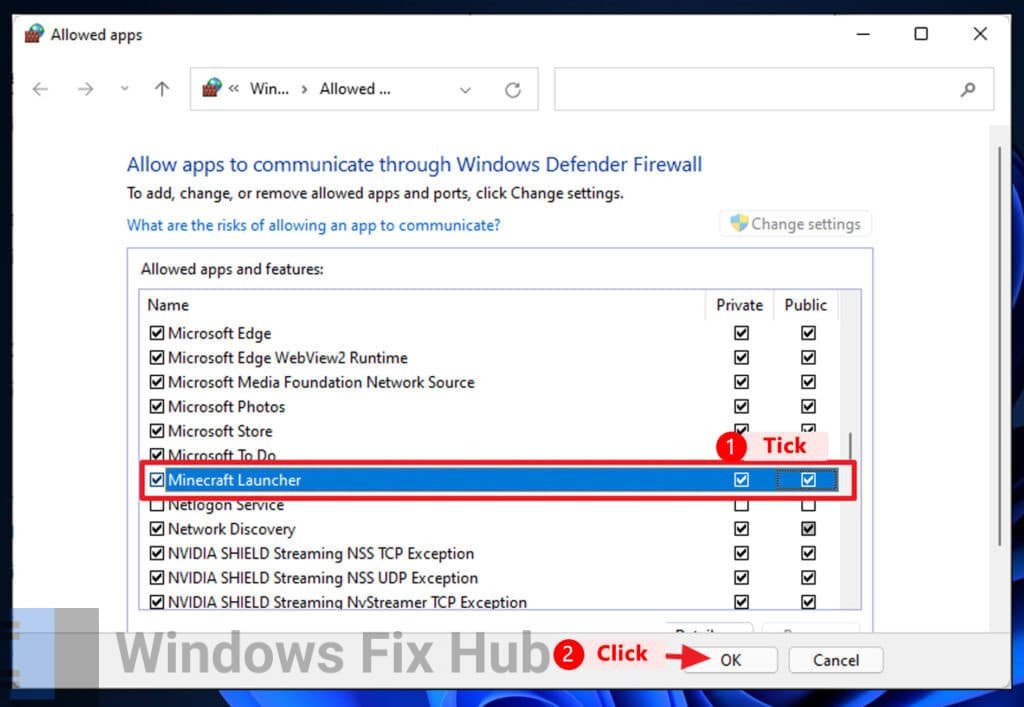
- Find all the “Minecraft” entries in the list and check the boxes labeled “Private” and “Public”.
- Click “OK” and exit the “Control Panel”.
Solution 5. Execute GameLauncherHelper.exe from the Xbox Games Directory
Running the GameLauncherHelper.exe directly can sometimes bypass issues related to the Minecraft Launcher installation. It ensures that necessary components are properly initialized.
- Use the shortcut ‘Win + E’ to launch “File Explorer” and navigate to “This PC”.
- Enter the main drive, typically drive C:.
- Locate and open the “XboxGames” folder.
- Go to the “MC” Launcher folder and double-click “GameLauncherHelper.exe”.
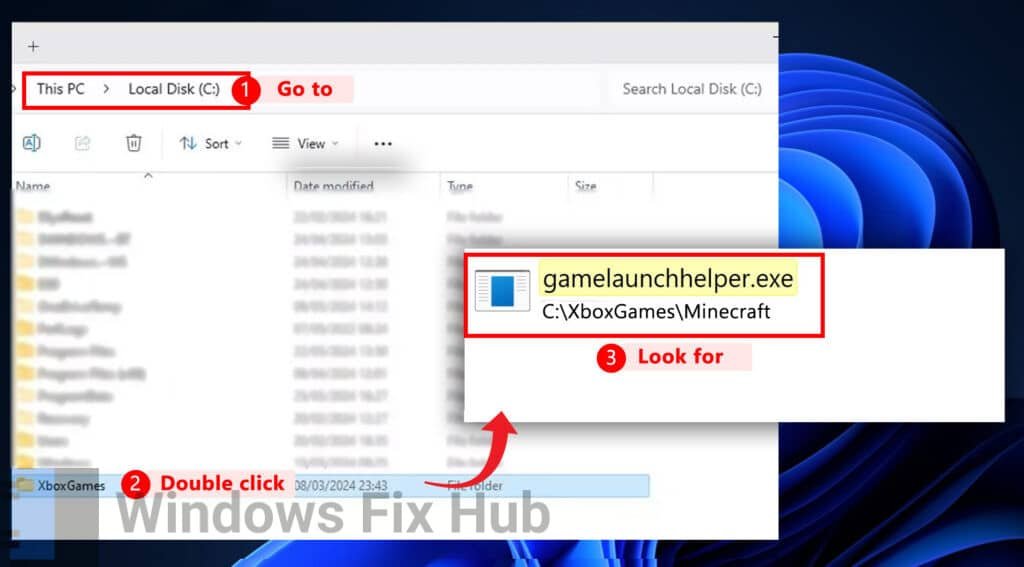
This action should grant you access to the Minecraft Launcher as usual.
Advanced Solutions to Fix Error 0x87e00009
When Trying to Install Minecraft (4 Ways)
If the easy fixes haven’t resolved the problem, don’t worry. There are still more advanced solutions you can attempt to troubleshoot and fix the Minecraft Launcher installation error.
Adv. Solution 1. Reset Windows Update Components
Resetting Windows Update components clears any corruption in the Windows Update system, potentially resolving installation errors.
- Press the ‘Win + S’ keys, search “cmd”, and select “Run as administrator”.
- Click “Yes” in the UAC prompt.
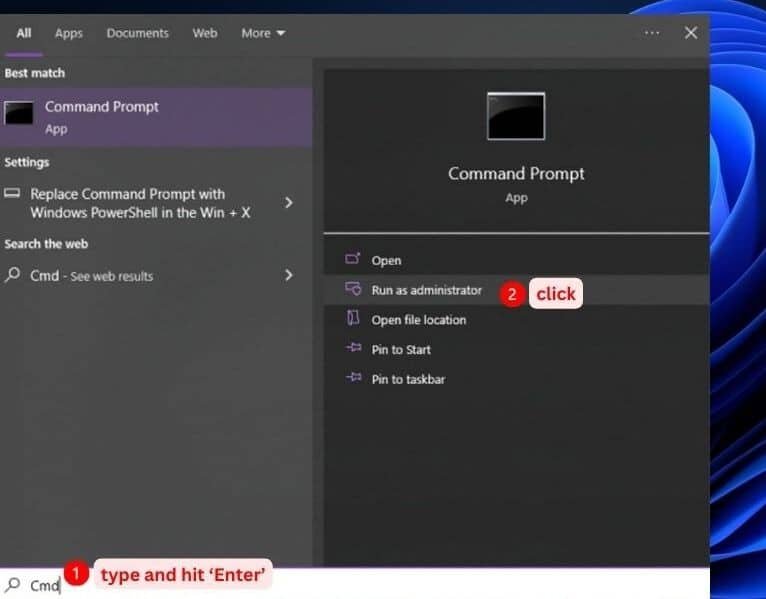
- Run the following commands one by one, pressing ‘Enter’ after each:
net stop bits
net stop wuauserv
net stop appidsvc
net stop cryptsvc
Del “%ALLUSERSPROFILE%\Application Data\Microsoft\Network\Downloader\*.*”
rmdir %systemroot%\SoftwareDistribution /S /Q
rmdir %systemroot%\system32\catroot2 /S /Q
regsvr32.exe /s atl.dll
regsvr32.exe /s urlmon.dll
regsvr32.exe /s mshtml.dll
netsh winsock reset
netsh winsock reset proxy
net start bits
net start wuauserv
net start appidsvc
net start cryptsvc
- Exit “command prompt” and restart your computer.
Adv. Solution 2. Fix Minecraft Launcher
Repairing the Minecraft Launcher can fix any corrupted files that might be causing installation issues.
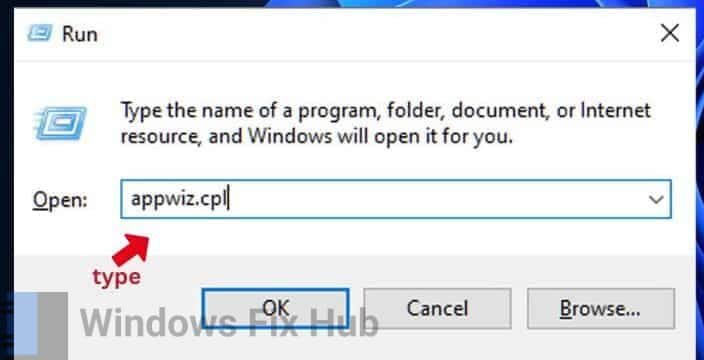
- Use the keyboard shortcut ‘Windows + R’ to access “Run”, input “appwiz.cpl”, and then press ‘OK’.
- Locate the “Minecraft installation” and choose “Repair”.
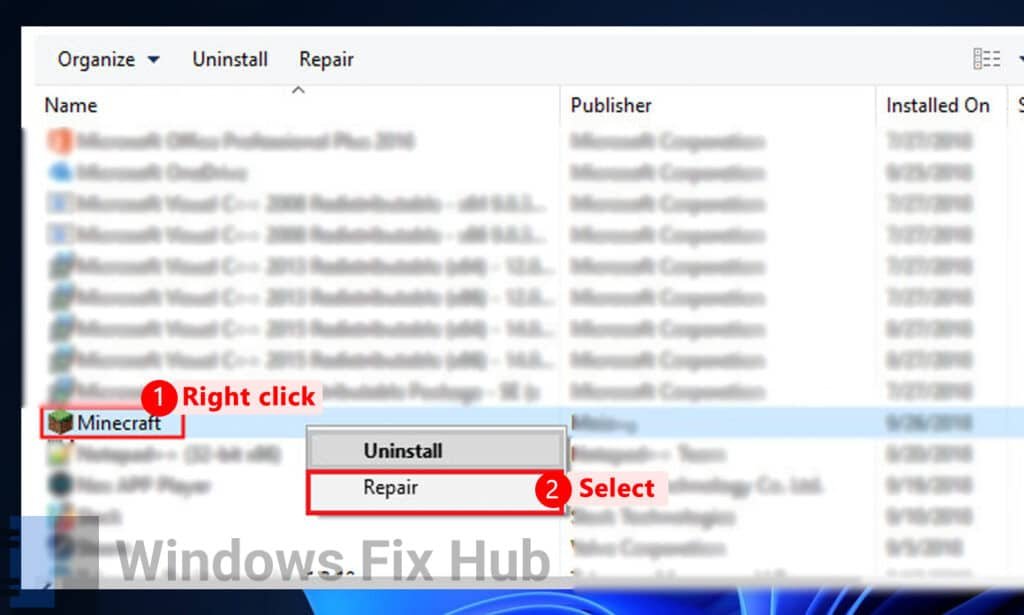
- Adhere to the prompts on the screen to complete the repair process for the Minecraft launcher.
Adv. Solution 3. Reset Microsoft Store
Resetting the Microsoft Store reinstates it to its default state. It resolves issues stemming from incorrect settings or corrupted files.
- Press the ‘Win + S’ keys, search for “installed apps”, and open it.
- Next to “Microsoft Store”, click the options icon and choose “Advanced options”.
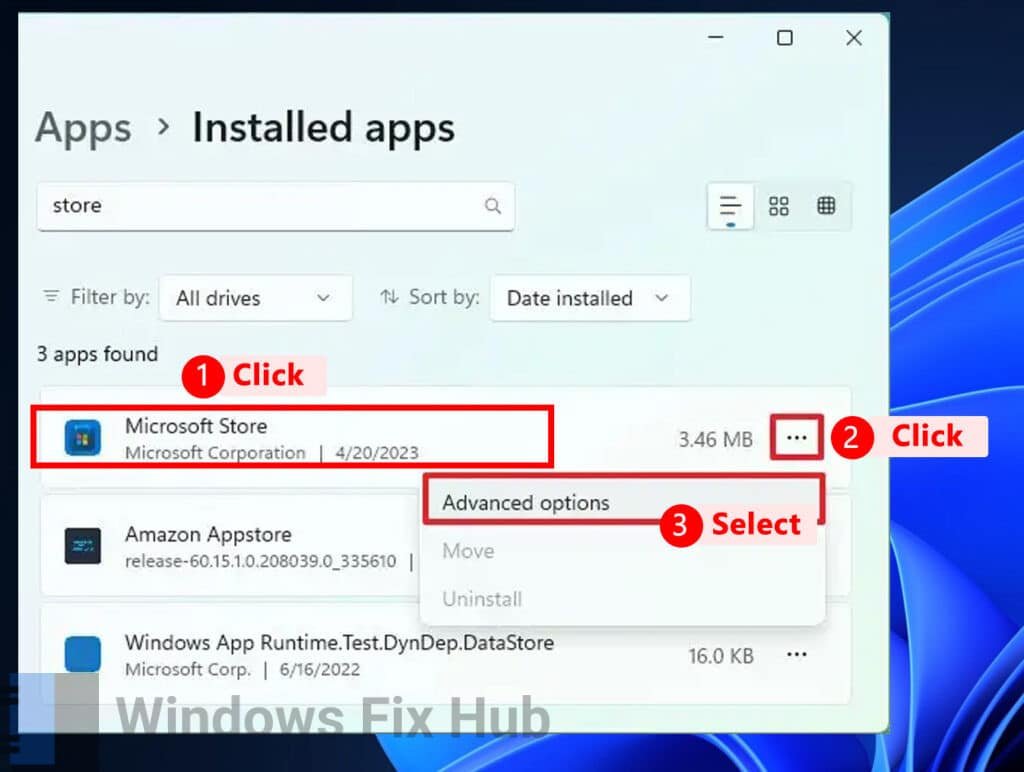
- Scroll down and opt for the “Reset” button.
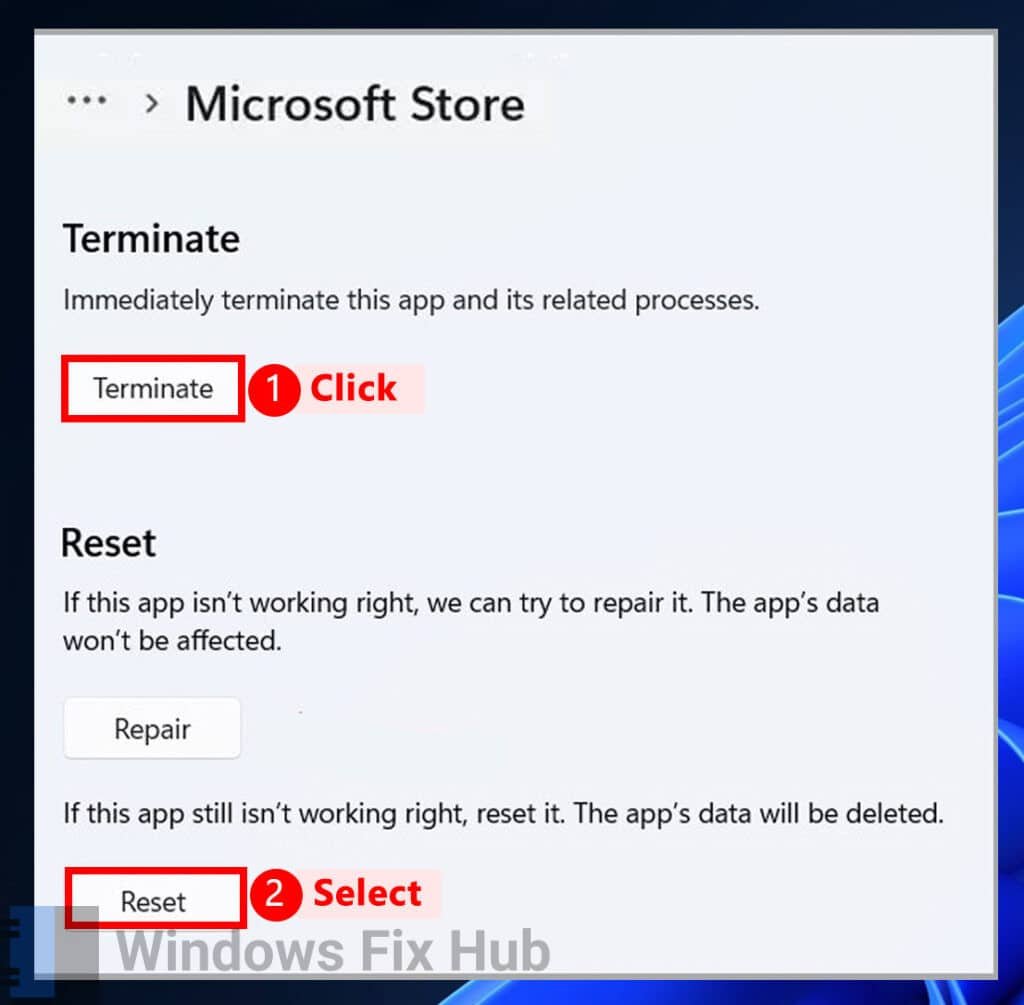
- Select “Reset” to permanently erase the app’s data from the device.
Adv. Solution 4. Re-register the Microsoft Store
Re-registering the Microsoft Store can be a more in-depth solution if other methods fail. It completely reinstalls the Microsoft Store, ensuring all components are up-to-date and correctly configured.
Click on the ‘Windows’ button and type “Windows PowerShell” in the search bar, then select “Run as Administrator”.
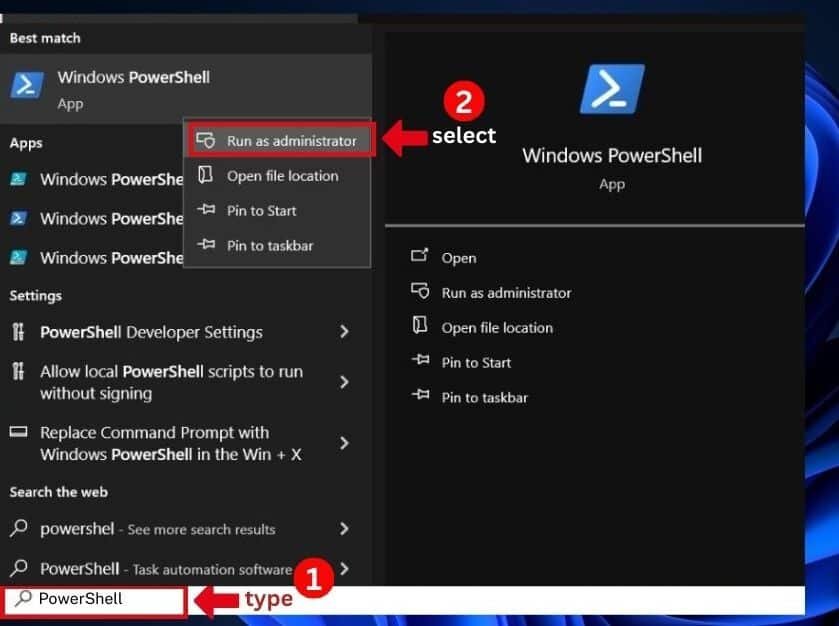
- Once PowerShell opens, enter the command provided below and press ‘Enter’:
Get-AppXPackage *Microsoft.WindowsStore* | Foreach {Add-AppxPackage -DisableDevelopmentMode -Register "$($_.InstallLocation)\AppXManifest.xml"}
- Wait for the procedure to be completed, it might take some, once completed, restart your computer and attempt to install the “Minecraft launcher” again.
Final Words
We’ve come to the conclusion of this article. By implementing the solutions provided, you should be able to resolve the Minecraft Launcher installation error code 0x87e00009 and resume enjoying your game without any further interruptions.
We genuinely hope that our guide has proven helpful to you.
iobit Advanced System Care is used by millions of users worldwide.
It’s a “must-have” for every PC or MAC user who wants:
- To fix common PC errors automatically
- To speed up their computer performance
- To fully secure their device

