Fix your Windows errors automatically with FREE Advanced SystemCare app & enhance your online security.
GeForce Experience is a valuable tool for optimizing game settings and updating NVIDIA drivers. However, many users have encountered error code 0x0003, which typically displays the following error messages:
- “Something went wrong. Try restarting GeForce Experience”.
- “Something went wrong. Try rebooting your PC and then launch GeForce Experience. ERROR CODE: 0x0003”.
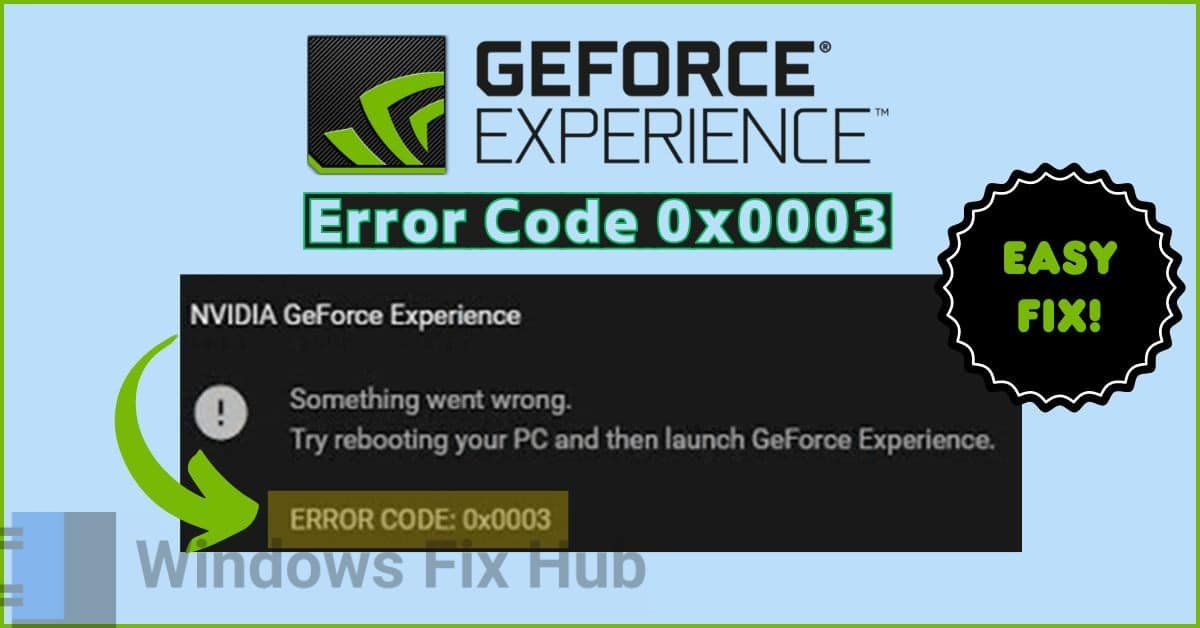
This error can occur due to several reasons, including corrupted Nvidia drivers, inactive Nvidia services, network adapter problems, or compatibility issues between the GPU driver and the latest Windows update.
These mentioned issues can also cause other graphics-related error like ‘GLFW Error 65542 on Minecraft’ and crosshair stuck on your monitor or even browser-related issues like Xulrunner.
This particular guide offers effective solutions with detailed instructions to fix this nVidia Geforce issue, so read on to solve it!
TRY IT NOW: How to Fix
GeForce Experience Error Code 0x0003 Quickly?
Here are a few quick solutions to fix the issue:
- Make sure the Nvidia Telemetry service is allowed to interact with the desktop by checking its properties.
- Check for and install any available updates for your Windows operating system.
- Temporarily disable your antivirus software to check if it is blocking NVIDIA software or updates.
- Completely uninstall the current NVIDIA graphics driver and GeForce Experience and then install the latest version from the NVIDIA website.
Easy Solutions to Solve Nvidia Error Code 0x0003 on Windows
Let’s start with simple solutions with detailed explanations. You can easily implement these. even with limited technical expertise.
Solution 1. Verify the Status of NVIDIA Services
Ensure that all NVIDIA services are running, as they manage communication between your system and the GPU.
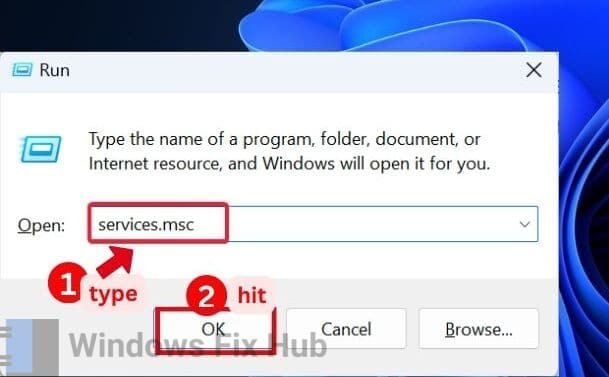
- Press ‘Win + R’, and the “Run” dialog box will appear.
- Type “services.msc” and hit ‘Enter’.
- In the “Services” window, locate all “NVIDIA” services such as NVIDIA Display Container LS, NVIDIA Telemetry Container, etc.
- Right-click each service and select “Start” if it is not running. If a service is already running, right-click it and select “Restart”.
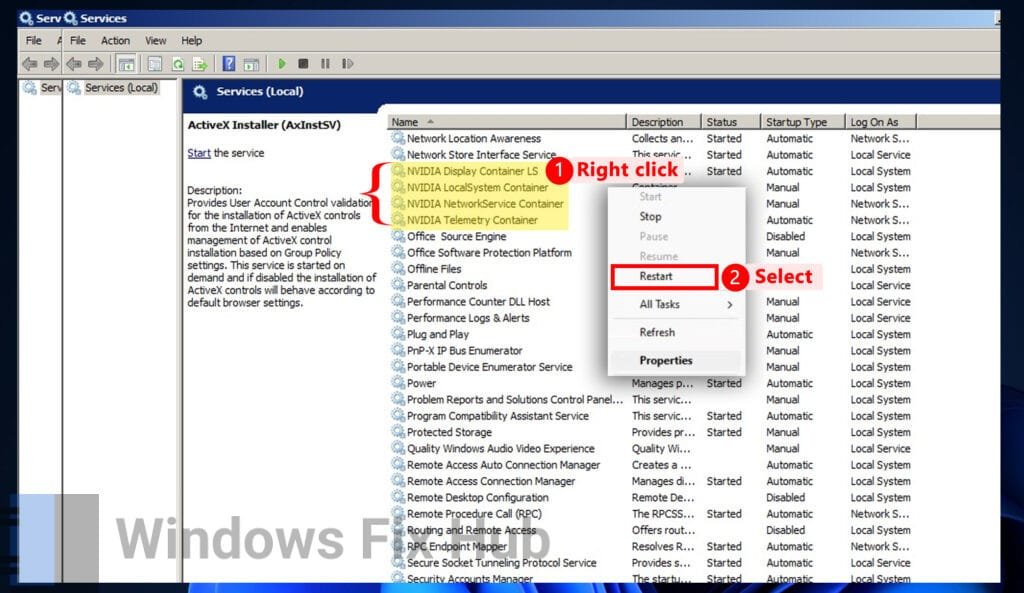
After enabling or restarting all necessary NVIDIA services, follow these steps to confirm the startup type:
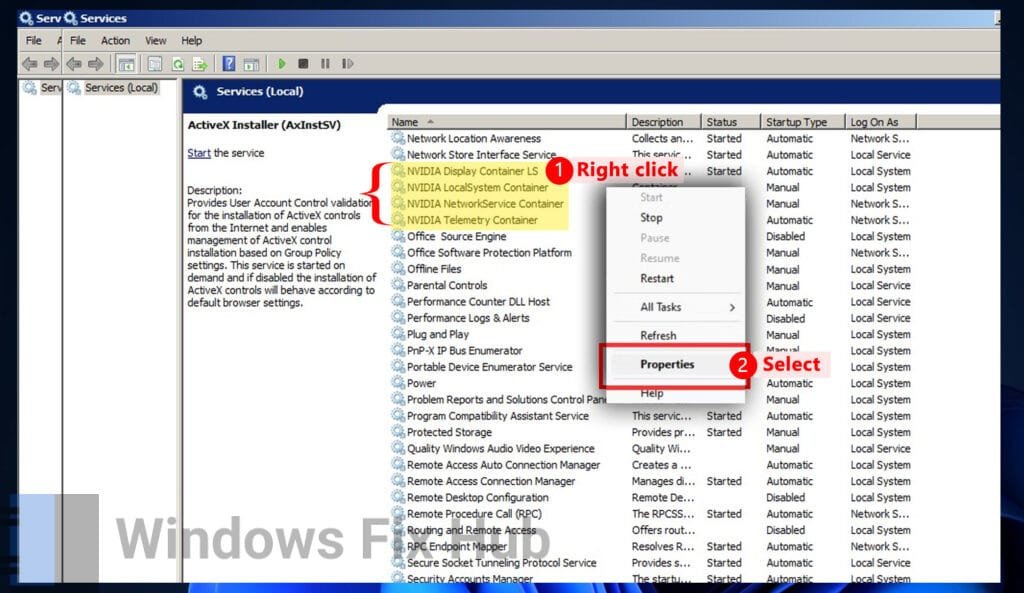
- In the same services window, locate the relevant “NVIDIA” services, right-click on each, and select “Properties”.
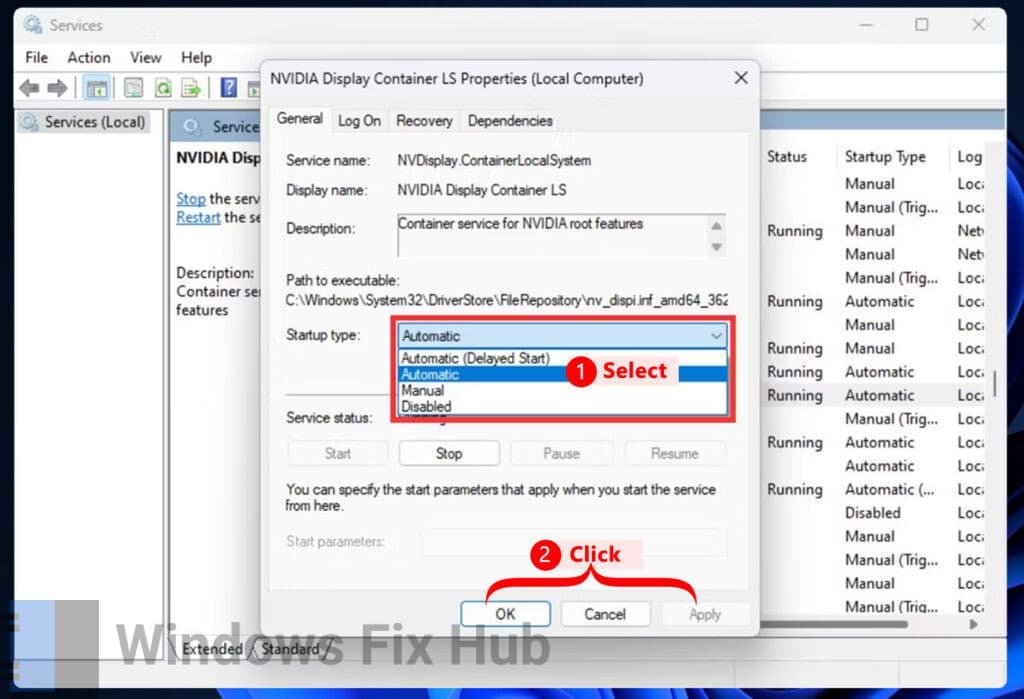
- Click the dropdown beside the “Startup” type.
- Choose “Automatic”, press “Apply”, and then “OK”.
Solution 2. Allow Nvidia Telemetry Service
Ensure that the Nvidia Telemetry services are active and permitted to interact with the desktop.
- Open the “Run” dialog box by pressing ‘Windows + R’.
- Type “services.msc” and press ‘Enter’.
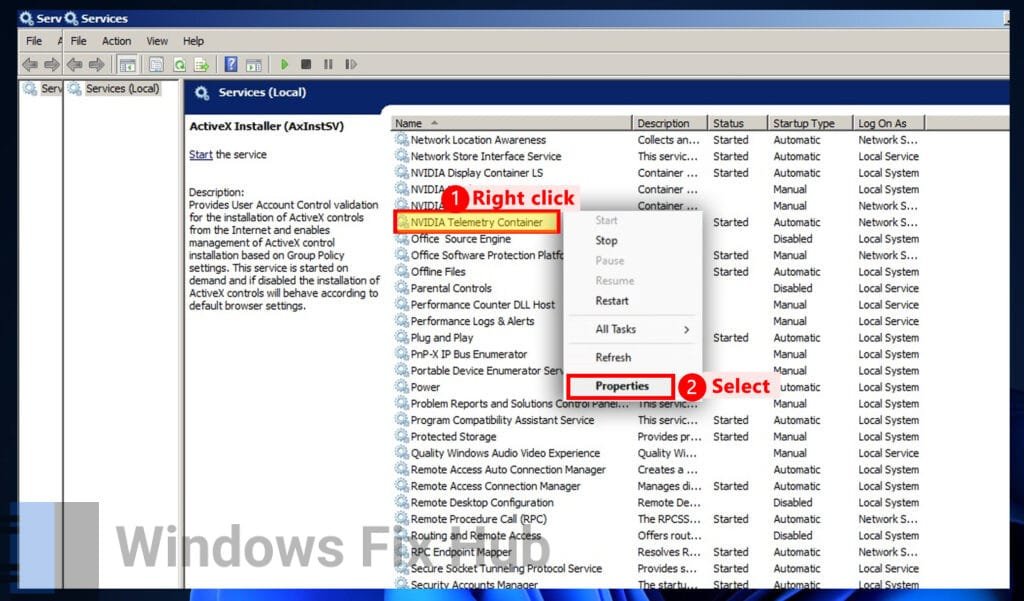
- Find “NVIDIA Telemetry Container”, right-click it, and press on “Properties”.
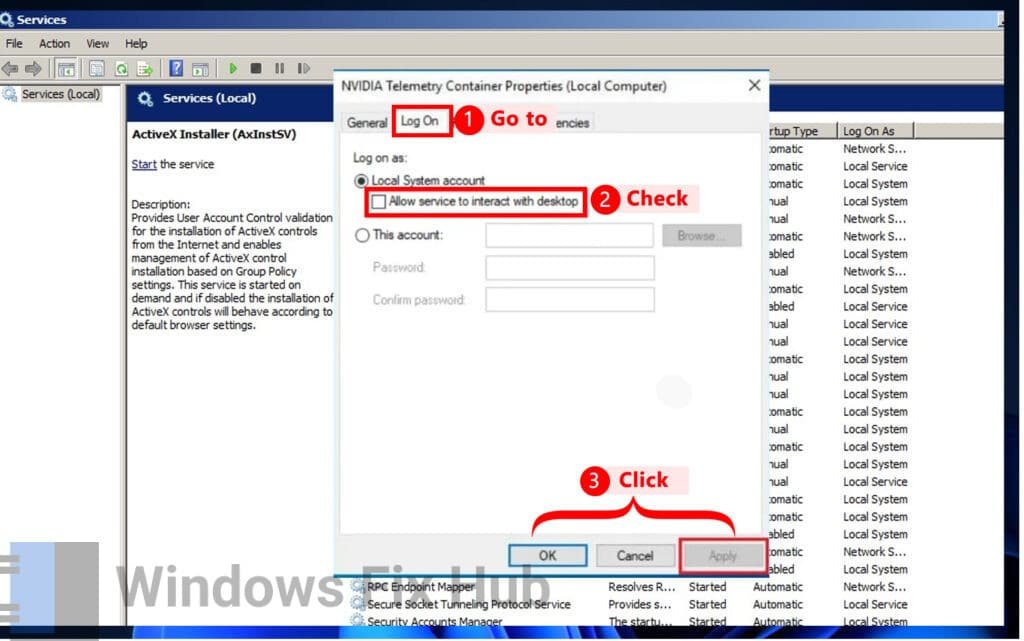
- Go to the “Log On” tab, select “Local System account”, and check “Allow service to interact with desktop”.
- Click “Apply”, then “OK”.
Solution 3. Check for Windows Updates
Updating Windows can resolve compatibility issues and bugs causing the error.
- Press ‘Windows + I’ to open “Settings”.
- Go to “Windows Update”.
- Click “Check for updates”.
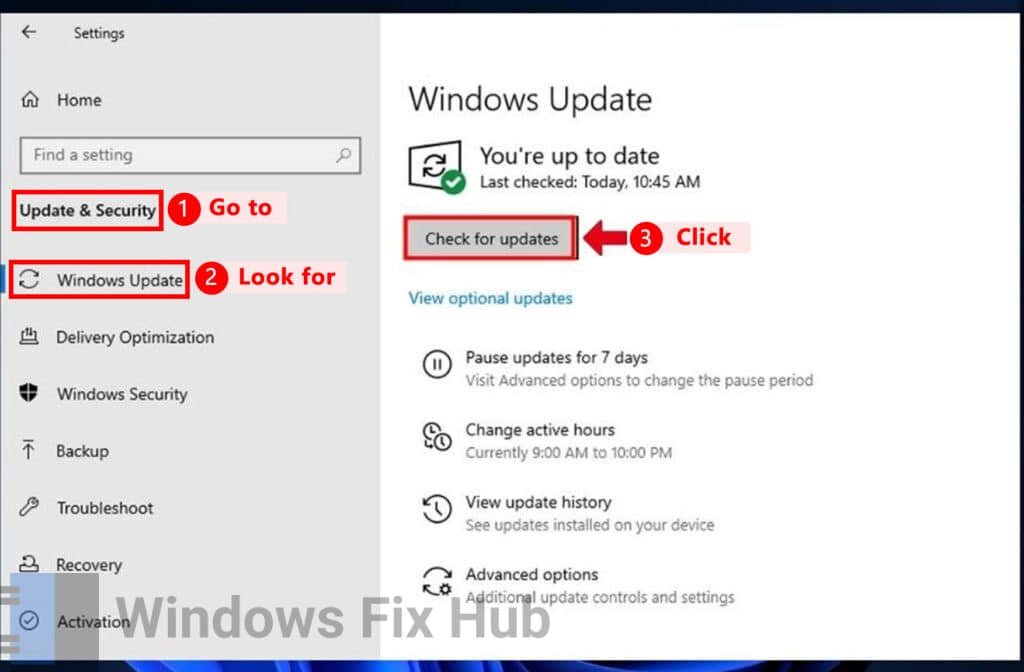
- If any updates are available, install them and restart your PC.
Solution 4. Delete Temporary Files
Temporary files on your system can sometimes interfere with the proper functioning of the GeForce Experience app. Removing these files may resolve the issue.
- Press ‘Windows + R’, type “%temp%”, and press ‘Enter’.
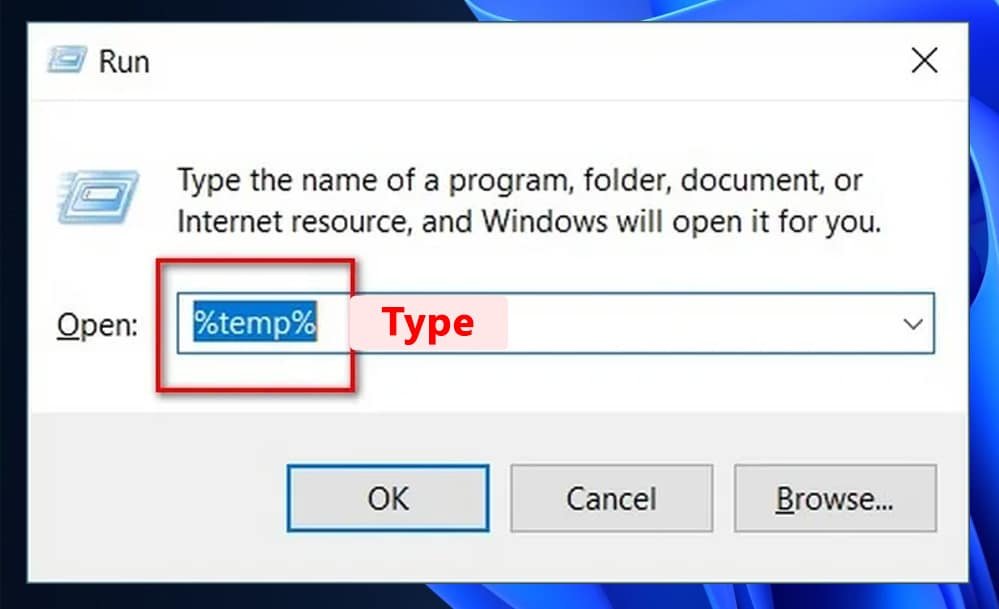
- When the ‘Temporary Files folder’ opens, press ‘Ctrl + A’ to select all files. Right-click and choose “Delete” from the dropdown menu. Confirm the deletion to remove all temporary files from your PC.
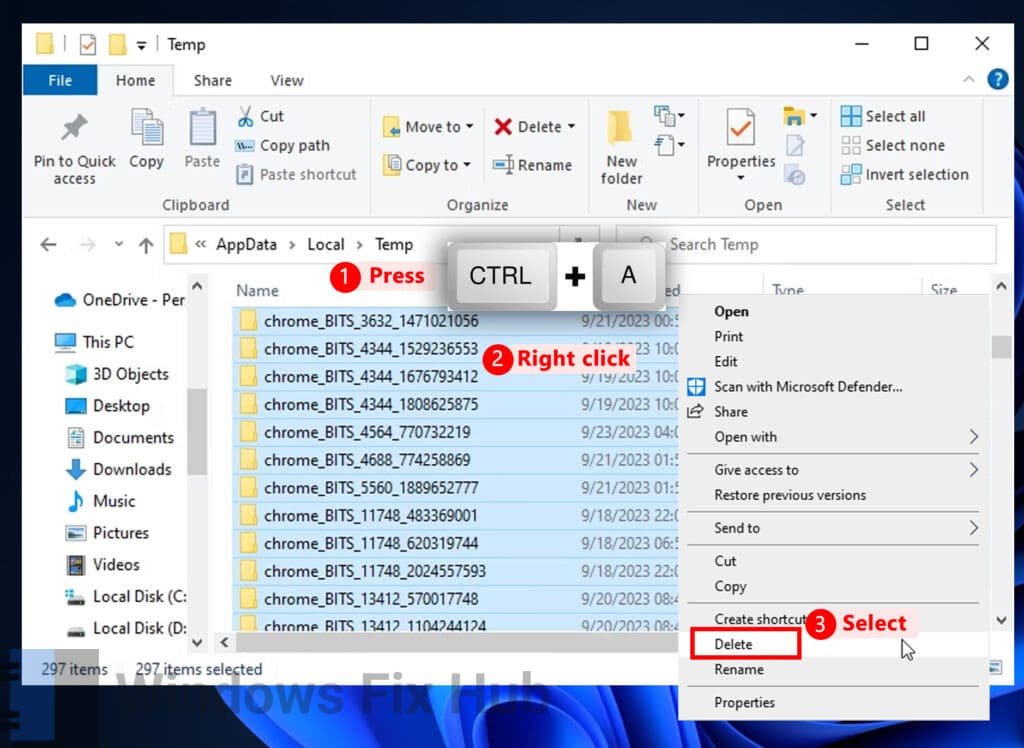
- You can now restart the “GeForce Experience” app.
Advanced Solutions to Fix GeForce Experience Error
Now, let’s explore more advanced fixes tailored to resolve underlying issues.
Adv. Solution 5. Disable Your Antivirus Temporarily
Antivirus programs can sometimes block GeForce Experience components. To check if that’s the case, you can temporarily disable your antivirus program.
- In the system tray, right-click the icon of the antivirus app.
- Click “Disable” or “Turn off”.
- Select a time frame, like ten minutes.
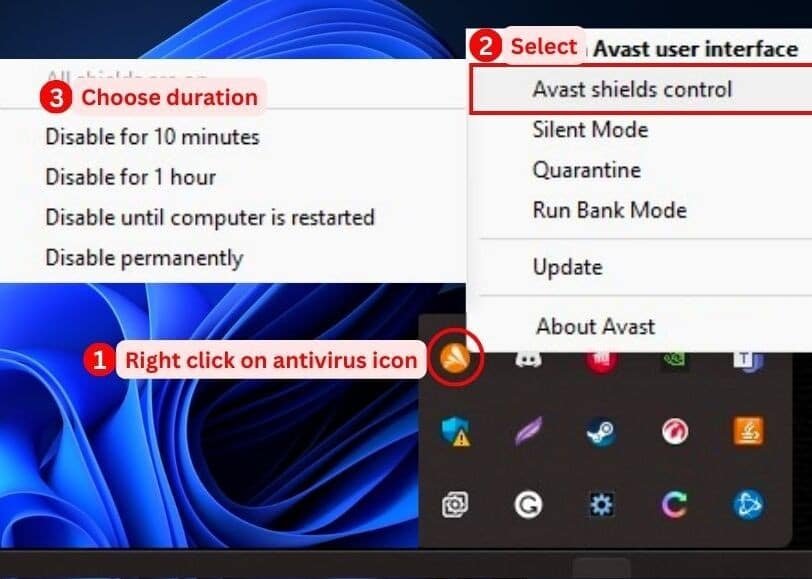
- Check if the app works fine now. If it does, you may need to allow it through your antivirus.
Adv. Solution 6. Reinstall GeForce Experience
Reinstalling GeForce Experience can resolve issues caused by corrupted installation files.
- Press the ‘Win + I’ keys to open “Settings”, click on “Apps”.
- Go to “Installed Apps”, find “GeForce Experience”, click on the menu (three dots) and select “Uninstall”.
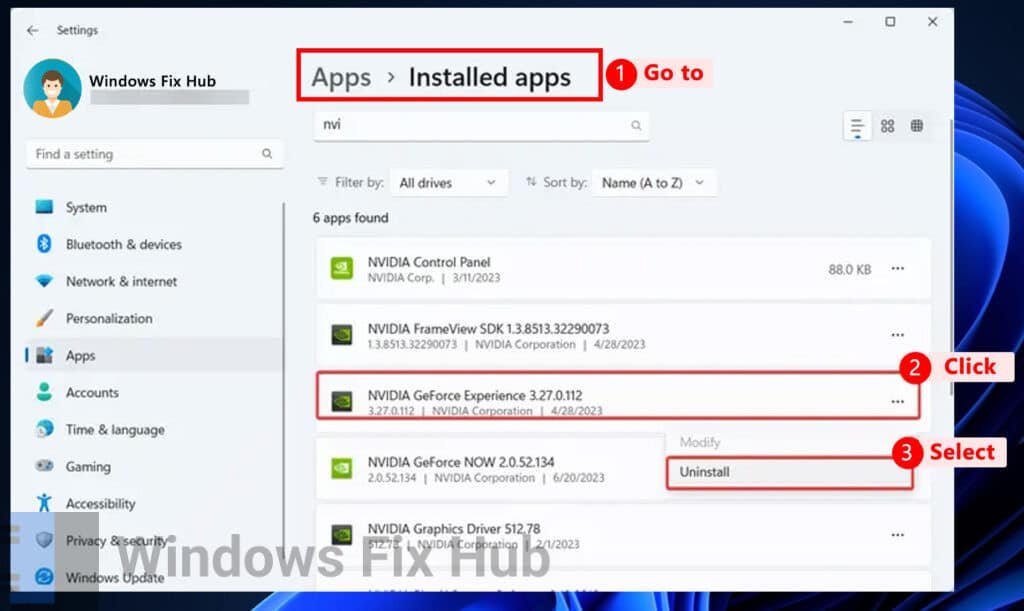
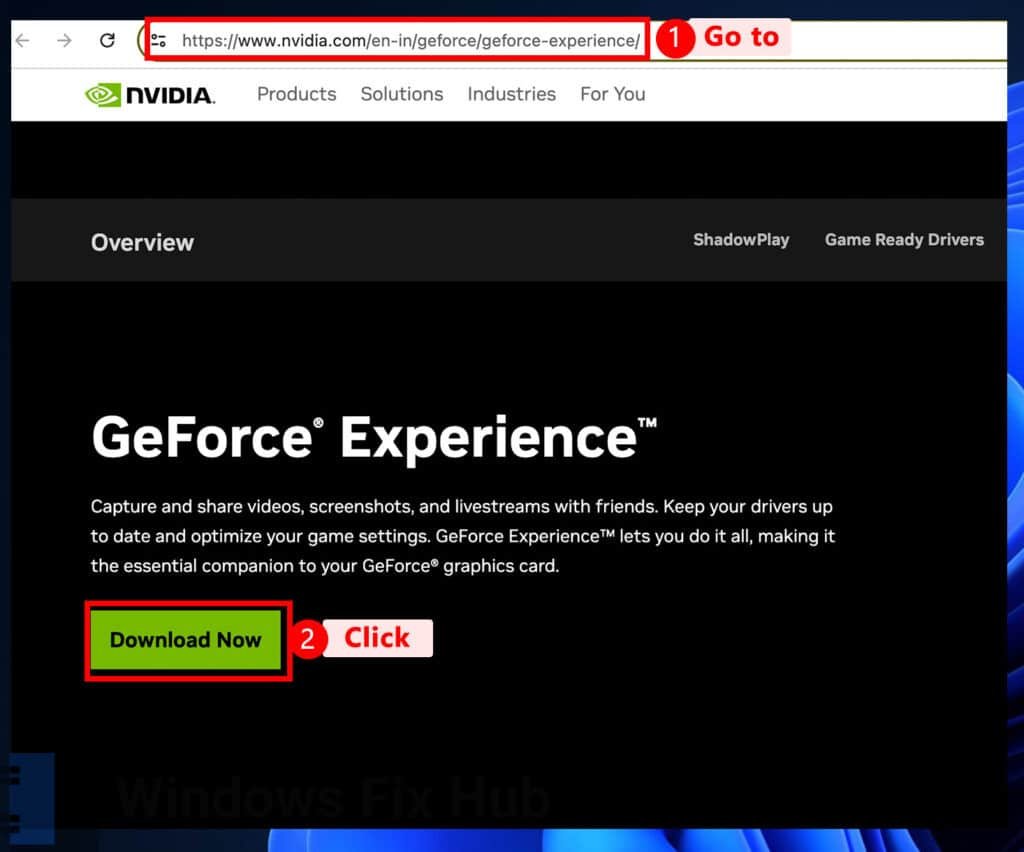
- Download and install the newest version from the NVIDIA website.
Adv. Solution 7. Uninstall and Reinstall the Latest Version of NVIDIA Graphics Driver
An outdated or corrupted NVIDIA graphics card driver can trigger this error. Ensure your NVIDIA graphics card driver is up to date. Before updating to the latest version, uninstall the current driver using the following steps:
- Press ‘Win + X’ and select “Device Manager”.
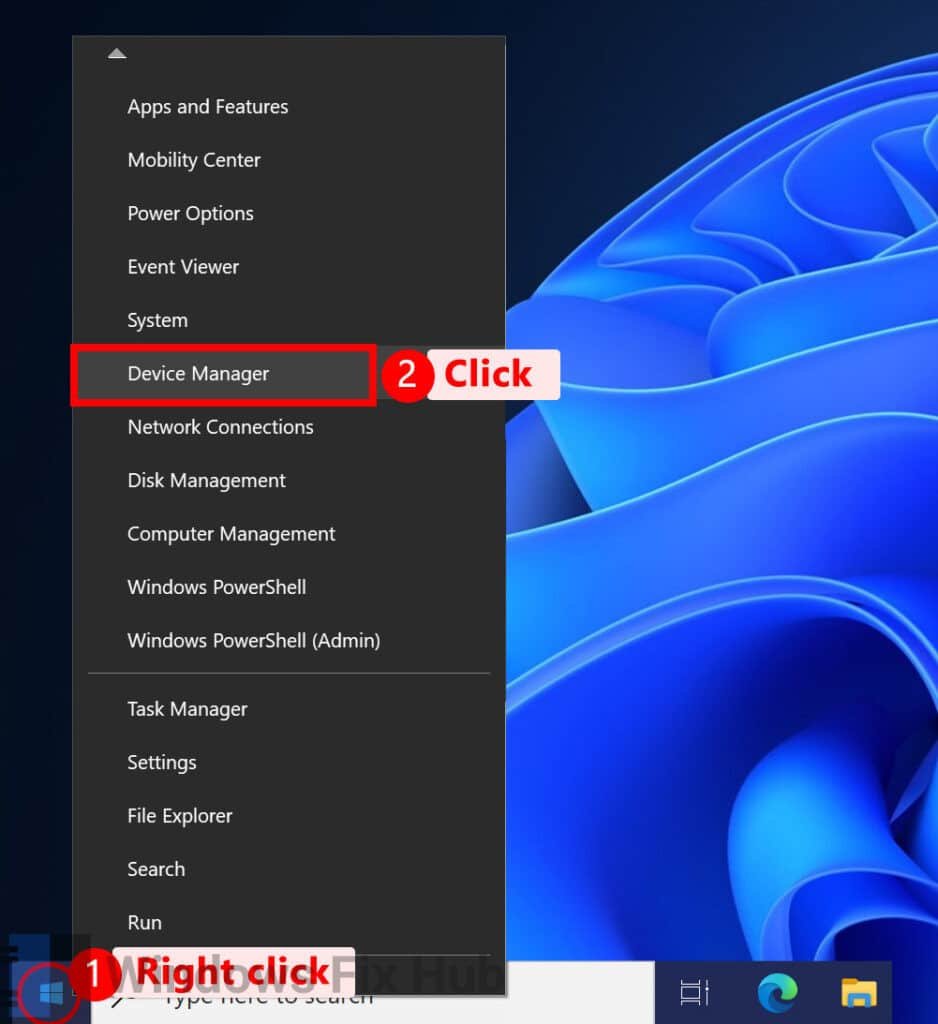
- Expand the “Display Adapters” section.
- Right-click on the NVIDIA graphics card driver and select “Uninstall device”.
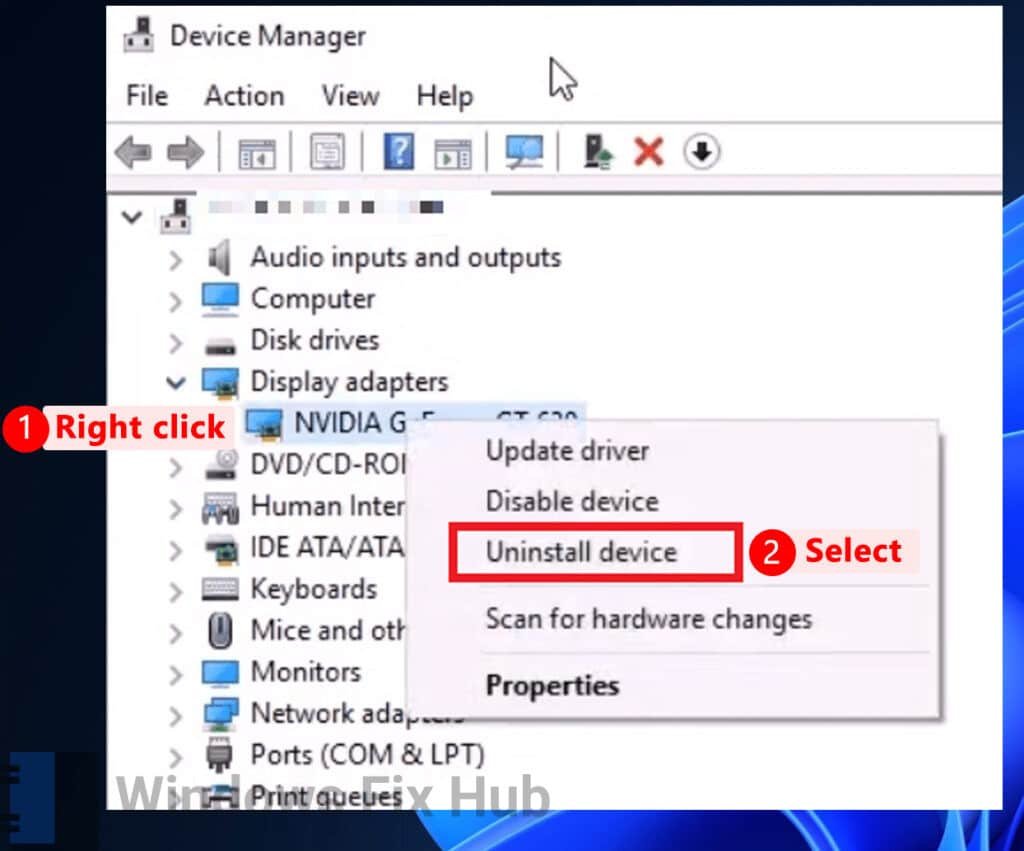
- After uninstalling the driver, download and install the latest version from the NVIDIA website. Use Display Driver Uninstaller (DDU) to remove the display driver completely. Then, run the installer file to install the new driver.
Adv. Solution 8. Reset Windows
As a last resort, resetting Windows can address underlying system issues that may be causing the error. Before resetting your Windows, uninstall GeForce Experience and the Nvidia Graphics driver. After the reset is complete, reinstall the app and the driver.
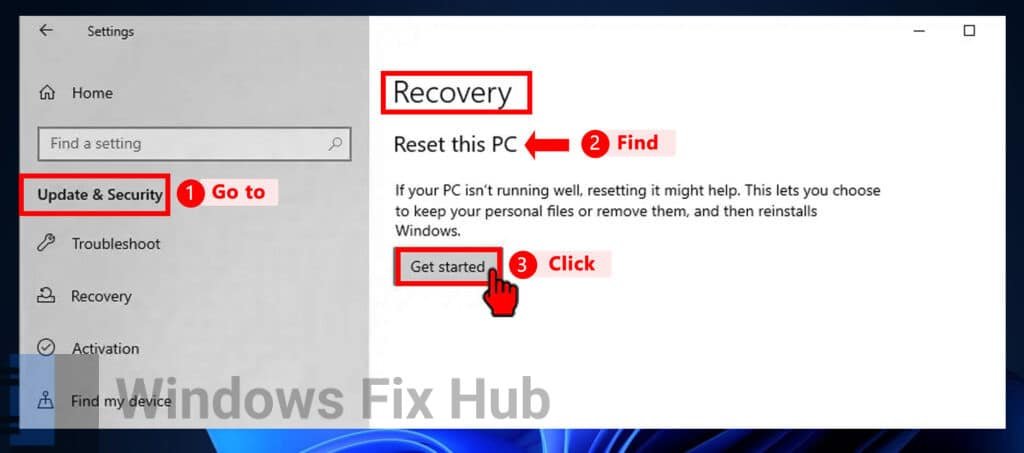
- Press ‘Windows + I’ to open “Settings”.
- Go to “Update & Security” > “Recovery”.
- Select “Get Started” under “Reset this PC”.
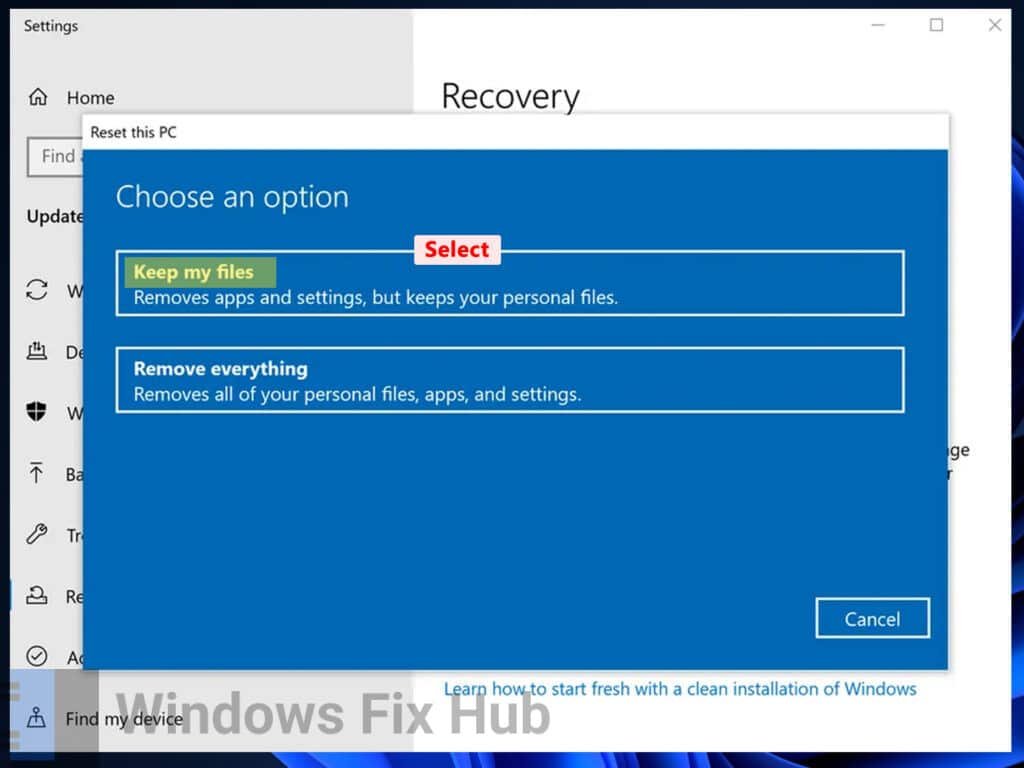
- Click “Keep my files”, and follow the instructions to complete the process.
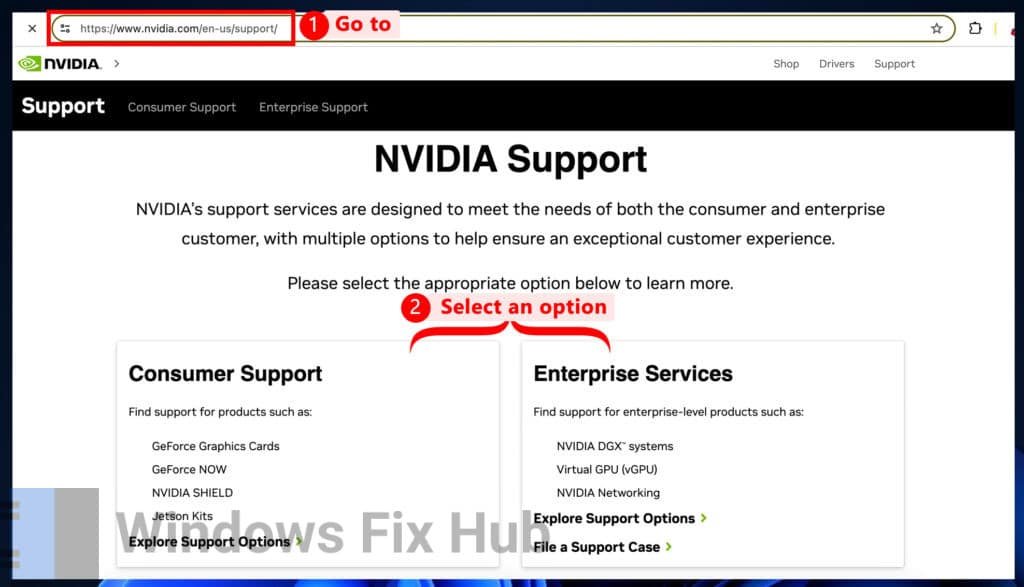
Adv. Sol. 9. Reach out to NVIDIA Customer Support
If all else fails, NVIDIA customer support can provide professional assistance.
- Visit the NVIDIA support website.
- Choose your issue or contact support directly for further help.
Note: in addition to this GeForce error, some users reported that their nVidia control panel is missing <- see how to fix it here.
iobit Advanced System Care is used by millions of users worldwide.
It’s a “must-have” for every PC or MAC user who wants:
- To fix common PC errors automatically
- To speed up their computer performance
- To fully secure their device

